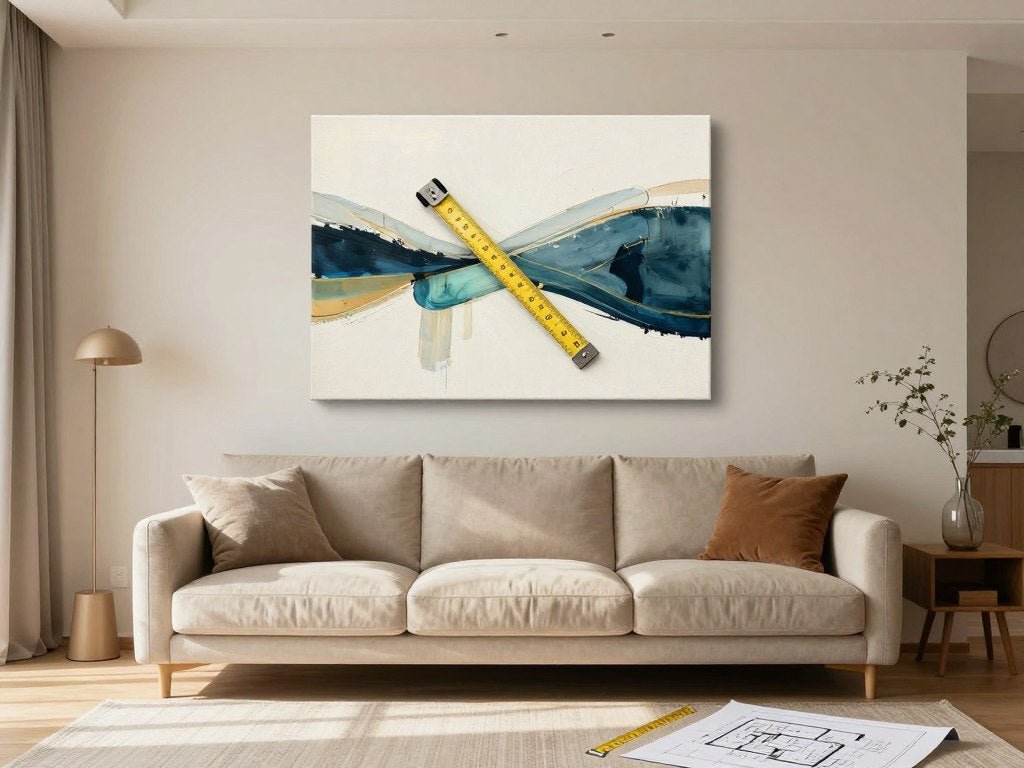
DIY Art for Home Decor: Style Your Walls Like a Designer
Want your home to feel collected, personal, and polished without hiring an interior designer? The smartest approach to diy art for home decor is not making another craft project. It is choosing finished art with care, then arranging it so scale, colour, spacing, and furniture work together.
Quick Answer
Effective DIY styling means buying and arranging finished wall art well. Use the room's scale, furniture, colour palette, spacing, and natural focal points to create a deliberate composition. Canvas prints and original paintings can look custom when the placement feels balanced.
In this article:
- Assess the room before choosing art
- Choose a focal point and wall coverage
- Use scale, size, and orientation
- Layer art with furniture and decor
- Build a balanced gallery wall
- Mix sizes, frames, colours, and styles
- Refresh wall decor on a budget
- Choose art for each room
- Work with colour and texture
- Select a statement piece
- Fix common styling mistakes
- Know how high to hang artwork
- Follow the simple styling process
- Key Takeaways
- Conclusion
- Frequently Asked Questions
Assess the Room Before Choosing Art
Start with the wall, not the artwork
Before opening a store or saving photo ideas, study the wall. Measure its width and height. Note nearby windows, doorways, shelves, vents, switches, and lamps. These details decide how much space your art can use.
Look at the furniture below the wall. A sofa, console, bed, or dining sideboard gives the composition a visual base. Art should usually relate to that anchor rather than float alone in a large empty area.

Record the room's visual language
- List the main colours already present in upholstery, rugs, curtains, and accessories.
- Notice whether the furniture has soft curves, sharp modern lines, or traditional details.
- Identify the light level and whether the wall feels warm, cool, bright, or shadowed.
- Decide whether the room needs calm, movement, contrast, or a stronger focal point.
A useful reference for colour relationships is the Benjamin Moore colour palette guide. You do not need to copy a palette. Use it to understand why related tones feel quiet while complementary colours create energy.
Choose a Focal Point and Decide How Much Wall to Fill
Give the eye one clear destination
Good wall art ideas begin with hierarchy. One area should receive the most attention. This may be a large canvas above a sofa, a vertical piece beside a staircase, or a three-piece arrangement in a dining room.
Do not make every wall equally loud. A home feels more refined when one statement piece art moment leads, while nearby walls support it with quieter prints, photos, or open space.

Use the furniture as a measuring guide
For art above furniture, a common starting point is artwork that spans about two-thirds to three-quarters of the furniture width. Leave visible breathing room at both sides. A small piece over a wide sofa can look accidental unless it is grouped with other pieces.
| Furniture width | Suggested art span | Best approach |
|---|---|---|
| 48–60 inches | 32–45 inches | One medium canvas or two smaller pieces |
| 70–90 inches | 48–68 inches | One wide canvas or a balanced triptych |
| Over 90 inches | 60–80 inches | Large statement art or a generous gallery wall |
Use Scale, Size, and Orientation with Confidence
Match the shape to the wall
Horizontal canvases support long sofas, sideboards, and beds. Vertical art works well beside a tall cabinet, in a narrow hallway, or between windows. Square pieces suit compact walls and can stabilize a group of varied shapes.
When a wall is tall, a short horizontal print may leave too much unused space. When a wall is narrow, a wide piece may compete with nearby trim. Scale is not about buying the largest canvas. It is about giving the wall the right visual weight.

Test the layout before you commit
Cut paper templates in the dimensions of your shortlisted pieces. Tape them to the wall. Step back from the room's main entrance, then view the layout from seating height. This simple process protects your time and money.
For a deeper look at grouping three works, read Rossetti Art's guide to sets of three wall art. It helps you compare equal spacing, varied heights, and one continuous visual story.
Layer Art with Furniture, Shelves, Mirrors, and Decor
Let the room create the frame
Layering makes finished art feel connected to the room. Lean a canvas on a deep shelf beside a small object. Place a framed photo near a mirror. Pair wall art with a lamp, plant, or sculptural vase so the eye moves through the whole area.
Keep the arrangement edited. Two or three supporting objects are often enough. Too many items can hide the artwork and make the wall look busy.

Use depth without making the wall crowded
- Keep the largest art piece behind smaller objects when styling a shelf.
- Repeat one material, such as wood, brass, black metal, or linen.
- Leave some wall visible around every main piece.
- Use a mirror to reflect light, not to compete with the focal art.
The Getty's composition resources offer helpful principles for balance, emphasis, and movement. These ideas apply to a home wall just as they do to a formal artwork.
Build a Balanced Gallery Wall
Choose a structure before choosing every piece
A gallery wall can include canvas prints, original art, photos, paper works, and textile art. It looks intentional when the group has one unifying rule. That rule might be a shared frame colour, a narrow palette, or a consistent visual mood.

Start with the largest piece. Add medium pieces around it, then use small works to fill gaps. Avoid creating a perfect rectangle unless the room calls for a formal look. A slightly organic outline feels relaxed but still planned.
Use a repeatable gallery wall method
- Measure the total area you want to fill.
- Lay the artwork on the floor and photograph the arrangement.
- Keep the gaps consistent, usually about two to four inches.
- Align at least one edge or centre line to give the group order.
- Transfer the layout with paper templates before adding hooks.
For exact hanging support, follow Rossetti Art's step-by-step gallery wall guide. The best gallery wall ideas reduce guesswork before a single nail enters the wall.
Mix Sizes, Frames, Colours, and Visual Styles
Use contrast with one connecting thread
How do you mix and match wall art without losing harmony? Keep one element consistent while allowing another to vary. You can mix frame finishes while repeating a colour. Or use different art styles in a single frame colour.
A modern abstract canvas can sit beside a botanical print when both share a warm rust tone. A black-and-white photo can balance a colourful painting when their sizes create a clear hierarchy.

Think in families, not matching sets
- Colour family: repeat two or three tones across the pieces.
- Frame family: keep frames similar when the art styles are varied.
- Subject family: connect works through nature, geometry, travel, or portraiture.
- Texture family: balance smooth prints with canvas texture, embroidery, or tactile textile art.
Acrylic paint, faux finishes, and craft supplies are not required for a layered look. Finished art can provide depth through brushwork, surface texture, paper grain, and frame shadow.
Want flexible canvas art for a changing home?
Browse finished works in different sizes and moods, then use your paper templates to find the right fit before you order.
Refresh Wall Decor with Budget-Friendly Swaps
Change the arrangement before changing the room
Budget-friendly DIY updates often begin with what you already own. Move a photo from the hallway to a bedroom. Group three small pieces on one wall. Swap a frame, rotate a canvas, or lower a shelf to change the entire look.

Another money-saving move is to buy one strong piece rather than several filler items. A carefully chosen print can create more impact than a collection of small objects that do not relate to each other.
Make a refresh plan
- Keep the pieces you genuinely love.
- Remove art that feels too small, damaged, or unrelated.
- Reframe paper art when the old frame distracts from it.
- Use one new focal piece to give existing decor a fresh role.
- Shop your home before visiting stores or adding another project.
Rossetti Art's main collection is a useful starting point when you want one considered addition rather than a full-room replacement.
Choose Wall Art for Living Rooms and Other Key Spaces
Living room
The living room can handle a confident focal piece. Try a wide canvas above the sofa, a pair of vertical works beside a media unit, or a gallery wall near the reading chair. The Rossetti Art living room canvas collection makes it easier to filter ideas by the room's role.
Bedroom
Choose quieter colour and softer movement. A horizontal canvas above the bed creates calm. Keep the lower edge high enough to avoid contact with pillows, but close enough to connect the bed and wall.
Hallway
Hallways benefit from a sequence. Repeat a frame, colour, or subject across several smaller pieces. Keep the centre of the arrangement close to eye level as people walk through the space.
Dining area
Dining rooms can support richer contrast. Blue, coral, green, and deep red can echo table linens, ceramics, or upholstery. Avoid placing fragile art where chair backs or swinging doors may hit it.

Work with Colour, Texture, and Contrast
Should wall art match furniture?
It should relate, but it does not need to match. Exact matching can make a room feel staged. Contrast adds life, especially when the room already has neutral furniture.
Pull one colour from the room and let art introduce a second or third tone. A green abstract can connect with plants or velvet seating. Coral can warm pale wood. Deep red can sharpen a room with black accents.

Let texture do quiet work
Canvas has a softer presence than glossy paper. A frame adds a crisp boundary. Textile art brings tactile interest. Use texture when a room feels flat, but avoid adding every surface at once.
When comparing modern wall art, look at the marks and spaces inside the piece. Strong shapes create energy. Open areas create calm. Your favourite ways to style art should support how you want the room to feel each day.
Select a Statement Piece That Leads the Room
Green abstract for mid-century spaces
The Mid-Century Modern Green Abstract Wall Art can anchor a room with walnut, cream, olive, or black accents. Use it as the largest piece, then repeat a small green detail elsewhere.

Red floral art for dramatic contrast
The Minimalist Floral Wall Art Canvas Print suits a dining room, bedroom, or dark accent wall. Its red bloom can become the room's colour cue without requiring matching red furniture.

Ocean and coral for a relaxed palette
The Ocean Coral Elegance canvas print gives a coastal room colour and movement. Pair it with linen, pale timber, woven texture, or blue ceramics rather than obvious nautical accessories.

Need a focal point for your living room wall?
Choose a finished canvas that gives the room direction, then build supporting colour and texture around it instead of starting from scratch.
Fix Common Wall-Art Styling Mistakes
Mistake: artwork is too small
If a piece looks lost above furniture, group it with another work or move it to a smaller wall. Do not automatically fill the gap with random decor.
Mistake: the art hangs too high
High placement disconnects the art from the furniture. Lower it until the composition feels like one unit, while keeping the room comfortable to use.
Mistake: every frame is different
Variety can be attractive, but too many frame finishes create visual noise. Keep the most noticeable frames limited to two or three finishes.
Mistake: the wall has no pause
Empty space is part of the design. If every wall has a project, photo, or print, none of the pieces gets enough attention.

Know How High to Hang Artwork
Use eye level as the starting point
For a single piece on an open wall, place the visual centre around 57 to 60 inches from the floor. In a home with taller or shorter residents, adjust for comfortable viewing.
Above furniture, leave roughly six to ten inches between the furniture top and the artwork's lower edge. The exact gap depends on the furniture height and canvas size. The goal is connection, not a rigid formula.
| Location | Starting placement | Adjustment tip |
|---|---|---|
| Open hallway wall | Centre near eye level | View it while standing and walking |
| Above sofa or console | 6–10 inches above furniture | Treat art and furniture as one group |
| Above a bed | Lower edge clearly above pillows | Check sightlines from the doorway |
Before hanging, consult the Smithsonian guidance on hanging art for conservation-minded handling. Use suitable hardware and ask for help with large canvases.

Follow This Simple DIY Styling Process
A practical plan from idea to finished wall
- Define the feeling. Choose calm, energetic, collected, coastal, dramatic, or minimal.
- Measure the space. Record the wall, furniture, ceiling height, and nearby obstacles.
- Select a lead piece. Let one canvas or original painting establish scale and mood.
- Choose supporting art. Add colour, subject, or texture that connects without copying.
- Plan on the floor. Photograph the layout and check the outer shape.
- Use paper templates. Tape each size to the wall and live with the plan for a day.
- Hang from the centre. Install the main piece first, then work outward.
- Edit after viewing. Remove one object if the composition feels crowded.

Make the process feel manageable
Do not buy every piece at once. Start with the wall that bothers you most. One successful arrangement builds confidence for the next room. This is the most useful fun way to approach DIY wall decor: make one clear decision, then refine it.
Key Takeaways
- DIY does not have to mean homemade. Finished art can be styled intelligently without acrylic paint, paper crafts, or complicated supplies.
- Measure the wall and furniture before choosing a canvas or frame.
- Use one focal piece, then support it with related colours, shapes, and texture.
- Gallery walls need a unifying thread, consistent spacing, and a planned outer shape.
- Budget-friendly DIY updates can come from swapping, grouping, reframing, and repositioning.
- Leave empty space so the room and the art can breathe.
- Choose art for the room's mood rather than forcing every piece to match.

Conclusion
The best diy art for home decor is thoughtful rather than complicated. You can create a designer-look wall by measuring first, choosing a clear focal point, mixing pieces with purpose, and allowing enough space between each element.
Start with one room and one finished artwork you love. Whether you choose a Rossetti Art canvas print or an original painting, let it guide the palette and layout. A considered wall can change the feeling of the whole home.
Keep Reading
- How to style a set of three wall art
- How to hang a gallery wall step by step
- The real guide to choosing paintings for home decor

Frequently Asked Questions
What counts as effective DIY art styling?
It means planning, buying, arranging, hanging, and editing finished art yourself. The key skills are scale, spacing, colour balance, layering, and placement. You do not need to make a canvas or complete a craft project.
How do you arrange wall art like an interior designer?
Begin with the furniture and the room's focal point. Choose one lead piece, measure the available wall, and create a floor plan before hanging. Designers also repeat colour, material, or subject so varied art feels connected.
How do you create a gallery wall without clutter?
Limit the palette or frame finishes, keep gaps consistent, and leave breathing room around the group. Use one large anchor piece and several smaller works rather than filling every inch with equal visual weight.
How do you mix different art sizes and frames?
Let one feature stay consistent. You might mix sizes and orientations while using black frames, or vary frames while repeating warm earth tones. Align a few edges to keep the arrangement calm.
How can I refresh wall decor on a budget?
Reposition pieces, create a new group, change a frame, or move art between rooms. Add one strong print instead of replacing everything. This creates a visible update while protecting your money and time.
How high should wall art be hung?
For an open wall, start with the centre of the artwork around 57 to 60 inches from the floor. Above furniture, begin about six to ten inches above its top, then adjust based on the room and sightline.
Should wall art match furniture or contrast with it?
It should relate to the furniture without matching it exactly. Repeat one colour or material, then add contrast through a different tone, shape, or subject. This gives the room personality.
Can canvas prints work with original paintings?
Yes. Mix them through a shared palette, subject, or frame treatment. Place the strongest piece where it can lead, then use the other art to support its colour and rhythm.
What supplies do I need for a wall-art project?
For styling finished art, use a tape measure, painter's tape, paper templates, pencil, level, suitable hanging hardware, and a helper for large canvases. Acrylic paint, craft supplies, faux materials, and embroidery tools are not needed.
More Ways to Refine Your Wall-Art Look
Once the main arrangement works, make small edits. Change a nearby cushion, move a lamp, or add one object that repeats the art's texture. These details help the wall feel part of the home rather than an isolated project.

Take a photo from the doorway after each change. A photo shows spacing and balance more clearly than standing close to the wall. Keep the version that feels calm, useful, and true to your home.


About the Author — Chiara Rossetti is the founder of Rossetti Art, a canvas print and original art brand. She writes about interior design, wall art styling, and the art of making a home feel alive.

About the Author
Chiara Rossetti
Chiara Rossetti is the founder of Rossetti Art, a canvas print and original art brand. She writes about interior design, wall art styling, and the art of making a home feel alive.

Leave a comment
This site is protected by hCaptcha and the hCaptcha Privacy Policy and Terms of Service apply.