
Getting wall art placement right transforms a room from ordinary to extraordinary. The difference between amateur and professional-looking spaces often comes down to a few key placement principles.
Many homeowners struggle with where to hang art. Too high feels disconnected. Too low crowds the furniture. The spacing feels off, and the entire room looks unbalanced.
This guide reveals the designer rules that consistently create stunning results. You'll learn exact measurements, spacing formulas, and room-specific strategies that eliminate guesswork.
The Foundational Eye-Level Rule for Hanging Art
Professional designers rely on the eye-level rule as their primary placement guideline. This universal standard creates visual harmony in any space.

Understanding the 57-Inch Standard
The center of your artwork should sit at 57 inches from the floor. This measurement represents average human eye level and aligns with museum and gallery standards worldwide.
To apply this rule, measure 57 inches up from your floor. Mark this point lightly with pencil. This spot indicates where the vertical center of your art should be, not the hook or top edge.
Calculate your hanging point by measuring your artwork's height, dividing by two, then subtracting that number from 57 inches. Add the distance from your frame's top edge to the hanging hardware. This final number tells you where to place your hook.
When to Adjust the Eye-Level Rule
Some situations call for modifications to the standard 57-inch measurement. Rooms with unusually high or low ceilings may benefit from slight adjustments.
In dining rooms where people sit most of the time, lower the art by 4 to 6 inches. The seated eye level differs from standing, and this adjustment maintains proper visual connection.
For spaces dominated by tall furniture or architectural features, you can raise pieces slightly. The art should still relate to human scale while acknowledging the room's proportions.

Geometric Harmony Print
This bold abstract piece naturally draws the eye when hung at the standard 57-inch center point. The strong geometric composition works beautifully with the eye-level rule.

Contemporary Portrait Study
Portrait pieces like this benefit most from proper eye-level placement. The direct gaze creates powerful connection when hung at 57 inches.

Botanical Serenity Print
This calming botanical work demonstrates how nature-inspired pieces create balance when following standard placement guidelines.
Start With Pieces Designed for Perfect Placement
These museum-quality canvas prints are sized and styled to work beautifully with the designer rules you're learning. Each piece arrives ready to hang with no guesswork required.
Mastering Spacing Between Frames and Furniture
The relationship between wall art and furniture below creates visual cohesion. Professional spacing makes rooms feel intentional rather than random.

The Furniture Spacing Formula
Leave 6 to 8 inches between your furniture's top edge and the bottom edge of your artwork. This distance feels connected without crowding.
Smaller gaps under 4 inches make art feel cramped against furniture. Larger gaps over 12 inches create disconnection, leaving artwork floating awkwardly on the wall.
For particularly large furniture pieces or sectional sofas, you can extend to 10 inches maximum. The key is maintaining visual relationship while allowing each element breathing room.
Spacing Between Multiple Pieces
When hanging multiple pieces together, maintain consistent spacing throughout. Gallery walls and arrangements work best with 2 to 3 inches between frames.
Tighter spacing under 2 inches makes individual pieces compete for attention. Wider spacing over 4 inches fragments the grouping and weakens the overall impact.
For diptychs and triptychs designed to be displayed together, reduce spacing to 1 to 2 inches. These multi-panel works function as a single composition and benefit from proximity.
Creating Balanced Negative Space
Negative space around artwork matters as much as the art itself. Empty wall space frames your pieces and prevents visual overwhelm.
Calculate your wall's total width and aim for artwork or groupings that fill roughly two-thirds to three-quarters of that space. This proportion creates balance without overcrowding.
Leave equal margins on both sides of centered pieces. Asymmetrical arrangements still need balanced negative space distribution to feel intentional rather than accidental.
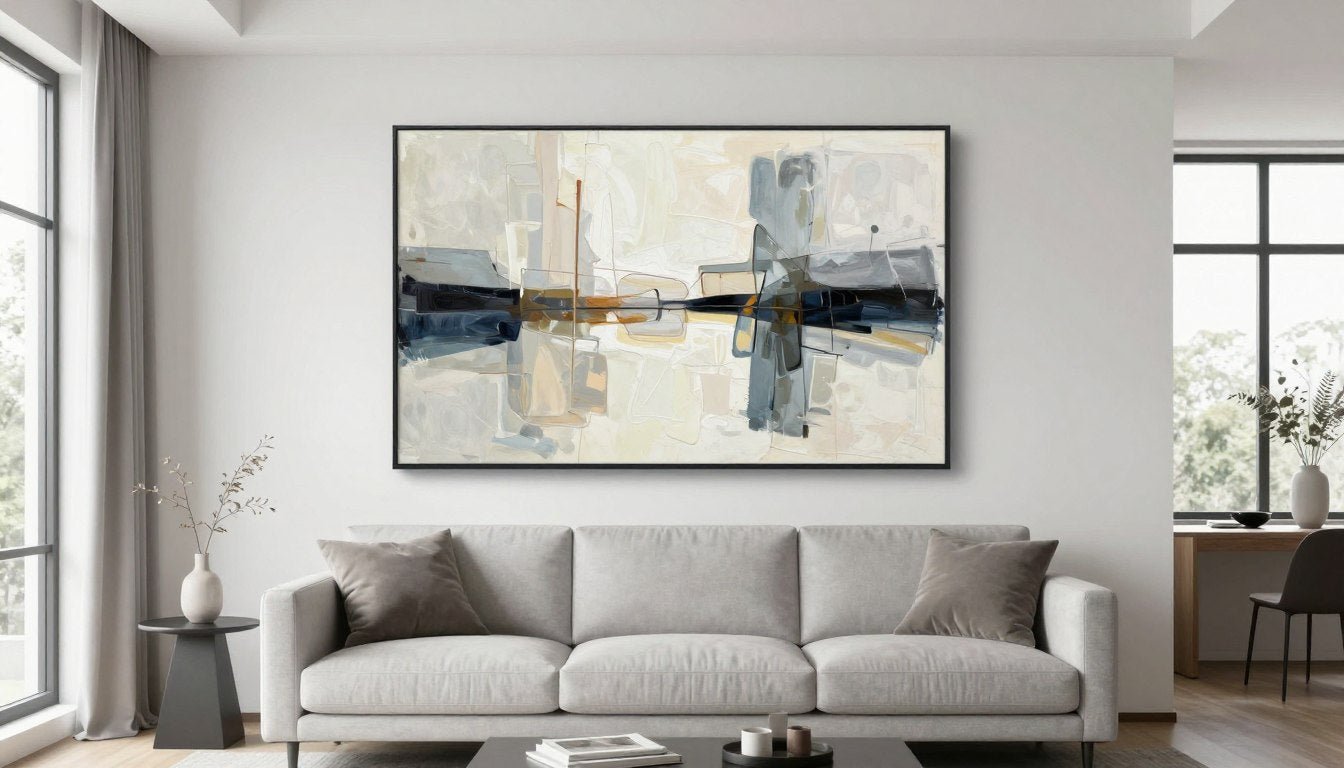
Strategic Wall Art Placement Above Sofas
The wall above your sofa offers prime real estate for impactful art display. This focal point deserves special attention to proportions and positioning.

Determining the Right Size for Over Sofa Art
Your artwork width should measure between two-thirds and three-quarters of your sofa's width. A 90-inch sofa pairs well with art spanning 60 to 67 inches.
Pieces that are too small disappear above substantial furniture. Art exceeding three-quarters of the sofa width overwhelms the space and disrupts balance.
For extra-long sectionals, consider multiple pieces arranged horizontally rather than one oversized work. A set of three medium prints often succeeds where a single massive piece would dominate.
Vertical orientation works for narrow wall spaces or when you want to draw the eye upward. Horizontal pieces complement most standard sofa arrangements and emphasize room width.
Height Considerations for Sofa Placement
Standard sofa backs sit around 30 to 36 inches tall. Adding the recommended 6 to 8 inches spacing puts your art's bottom edge at approximately 36 to 44 inches from the floor.
This placement naturally positions artwork centers close to the ideal 57-inch eye level when accounting for typical frame heights. The formula self-corrects for proper sightline even without measuring.
Low-profile modern sofas with backs under 28 inches require adjustment. Maintain the 6 to 8 inch spacing rule, which automatically raises the art to compensate for lower furniture.
Pro Tip: Before committing to hooks, cut paper templates matching your artwork dimensions. Tape these to the wall to visualize the final placement and experiment with positioning until it feels right.
Consider exploring living room canvas art specifically curated for above-sofa placement with ideal proportions.
Entryway Wall Art Placement That Creates Impact
Your entryway sets the tone for your entire home. Strategic wall art placement in this transitional space makes powerful first impressions.

Working With Entryway Proportions
Entryways often feature narrow walls or limited space. Vertical pieces work exceptionally well in these compact areas, drawing the eye upward and creating the illusion of height.
The standard eye-level rule applies perfectly in entryways where people typically stand. Position the artwork center at 57 inches for optimal viewing as guests enter.
If your entryway includes a console table or bench, apply the same 6 to 8 inch spacing rule. This creates cohesive design language connecting your entry furniture with wall decor.
Multiple Piece Arrangements in Entries
Small entryways benefit from single statement pieces rather than complex arrangements. One well-chosen work creates focus without cluttering limited space.
Larger entries with expansive wall space can accommodate gallery-style arrangements. Maintain the 2 to 3 inch spacing between frames and center the entire grouping at eye level.
Consider the traffic flow through your entryway. Art should enhance the space without creating visual obstacles or competing with doorways and architectural features.
Discover entryway wall art designed to make unforgettable first impressions with proper scale and impact.
Lighting Matters: Entryways often lack natural light. Position track lighting or picture lights to illuminate artwork without creating glare. Proper lighting elevates even modestly sized pieces to focal-point status.
Bedroom Wall Art Placement for Relaxation and Balance
Bedroom art placement follows unique considerations. This intimate space requires softer approaches that promote rest while maintaining design principles.

Above the Bed Placement Rules
Center your artwork above the bed, aligning it with the headboard's midpoint. This creates symmetry that feels natural in sleeping spaces.
The bottom edge of your art should sit 5 to 9 inches above your headboard. Lower placement risks damage from pillows and bedding. Higher placement creates disconnect from the bed itself.
Artwork width should span roughly two-thirds of your headboard width. For a queen bed with a 60-inch headboard, aim for art measuring 40 to 45 inches wide.
Alternative Bedroom Wall Placement
The wall opposite your bed offers excellent placement for pieces you'll view while lying down. Standard eye level drops to approximately 48 inches when considering a reclined viewing angle.
Walls flanking your bed work well for smaller complementary pieces. These side walls benefit from lower placement around 50 to 54 inches to the center, accounting for viewing from a seated position on the bed.
Avoid hanging art directly above nightstands where reaching for lamps or alarm clocks risks damage. Leave this area for functional items or keep it clear.
Match This Vibe to Your Space
Explore our curated bedroom collection featuring calming pieces that naturally work with these placement principles. Each canvas print promotes relaxation while maintaining proper scale for above-bed display.
Select from our bedroom canvas prints collection for artwork designed to promote restful environments.
Dining Room Wall Art Placement That Sparks Conversation
Dining rooms present unique placement challenges. Art in these spaces must work for both seated and standing viewers while enhancing the dining experience.

Adjusting for Seated Eye Level
Lower your artwork by 4 to 6 inches from the standard 57-inch center point in dining rooms. This adjustment accounts for the fact that people experience dining room art primarily while seated.
Position the art center around 51 to 53 inches from the floor. This height creates comfortable viewing angles for dinner guests without requiring them to look uncomfortably upward.
The wall behind your dining table or buffet serves as the natural focal point. Center artwork on this wall, ensuring it relates proportionally to the furniture below.
Sizing Art for Dining Spaces
Dining room art can make bold statements. Consider pieces that span 60 to 75 percent of your buffet or sideboard width.
For walls without furniture below, assess the wall's total dimensions. Art should fill roughly half to two-thirds of the wall width while leaving generous negative space on all sides.
Avoid overwhelming smaller dining areas with oversized pieces. A single well-proportioned work outperforms multiple small pieces that fragment visual attention.
Browse dining room wall art featuring conversation-starting pieces sized for communal spaces.
Lighting Considerations in Dining Rooms
Chandelier and pendant lights above dining tables create shadow patterns. Position art to avoid direct shadows falling across the image from overhead fixtures.
Consider adding picture lights or track lighting dedicated to illuminating artwork. This separate light source ensures art remains visible during evening meals when ambient lighting dims.
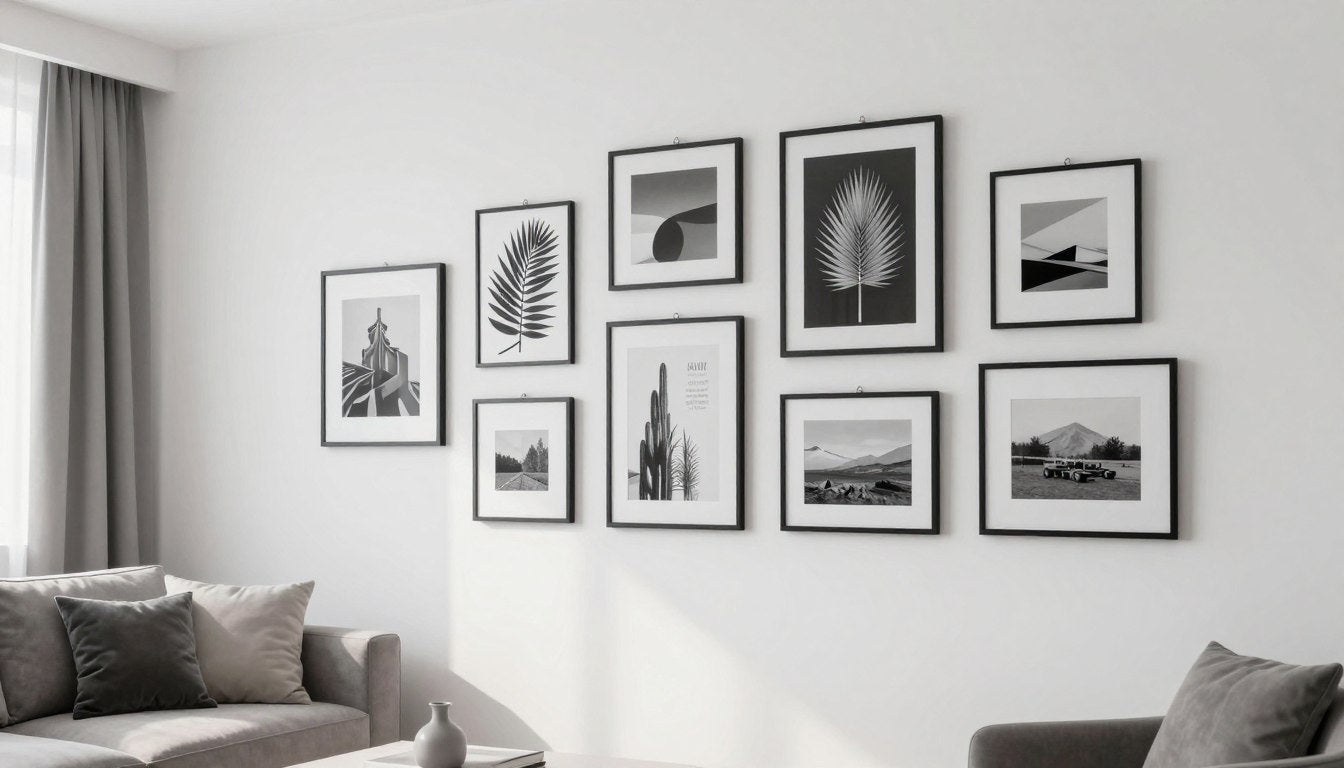
Creating Gallery Walls With Balanced Arrangements
Gallery walls showcase multiple pieces in cohesive arrangements. These curated collections require careful planning to achieve professional results.

Planning Your Gallery Wall Layout
Start by treating the entire gallery wall as a single unit. Measure the total arrangement dimensions and center the midpoint at 57 inches from the floor.
Cut paper templates matching each piece's dimensions. Arrange these on the floor first, experimenting with layouts until the composition feels balanced.
Transfer the floor arrangement to your wall using painter's tape. This preview reveals spacing issues and allows adjustments before making any holes.
Gallery Wall Spacing Rules
Maintain consistent 2 to 3 inch spacing between all pieces in your gallery wall. Uniform gaps create visual rhythm and professional polish.
Start with your largest or most important piece as the anchor. Build the arrangement outward from this focal point, balancing sizes and colors.
Aim for roughly equal negative space around the entire perimeter. Gallery walls need breathing room on all sides to feel intentional rather than cramped.
Frame and Mat Consistency
Gallery walls work best with a cohesive look. Choose frames in the same color family even if you vary sizes and styles slightly.
Consider using identical mat widths across all pieces. This consistency unifies disparate artwork and creates a collected-over-time appearance.
Limit your color palette to three main colors plus neutrals. Too many competing colors fragment the arrangement and weaken overall impact.
Explore canvas print sets designed to work together in gallery wall arrangements with coordinated colors and themes.
Common Mistake: Hanging gallery walls too high is the most frequent error. Remember to center the entire grouping at eye level, not individual pieces. The arrangement's center point should hit 57 inches, with some pieces naturally sitting higher and others lower.
Small Space Wall Art Placement That Maximizes Impact
Limited square footage requires strategic art placement. Small spaces demand thoughtful approaches that enhance rather than overwhelm.

Scale and Proportion in Compact Rooms
Small rooms benefit from fewer, larger pieces rather than multiple small works. A single statement piece creates a focal point without cluttering limited wall space.
The eye-level rule remains constant regardless of room size. Position art centers at 57 inches even in powder rooms, hallways, and compact bedrooms.
Choose vertical orientations in narrow spaces. Tall pieces draw the eye upward, creating the illusion of higher ceilings and more expansive rooms.
Strategic Placement to Expand Spaces
Position art on the wall you see first when entering a room. This immediate focal point distracts from limited dimensions and creates visual interest.
Avoid placing art on every wall in small spaces. Restraint allows remaining walls to provide essential negative space that prevents claustrophobia.
Light-colored artwork and pieces with significant white or neutral areas work best in compact rooms. Dark, heavy pieces absorb light and make small spaces feel smaller.
Consider exploring line art canvas prints that offer visual interest without overwhelming small spaces.
Office and Workspace Wall Art Placement for Productivity
Art in workspaces influences mood and productivity. Proper placement creates inspiring environments without distracting from tasks.

Positioning Art in Home Offices
Hang artwork where you'll see it during breaks rather than directly in your sightline while working. The wall behind your monitor or opposite your desk works well.
Standard eye level applies, but consider your seated working height. If your chair positions your eyes lower than standing height, adjust down by 2 to 3 inches.
Choose artwork that motivates without overstimulating. Abstract pieces in calming colors support focus better than busy, detailed works that draw prolonged attention.
Art Behind Video Call Backgrounds
The wall behind your desk appears in video calls. Position art on this wall at a height visible in your camera frame, typically 48 to 60 inches to the center.
Ensure artwork doesn't create distracting backgrounds during calls. Simple compositions in neutral or complementary colors work best for this high-visibility placement.
Avoid glossy surfaces that create glare or reflections on camera. Matte finish canvas prints eliminate this common video call issue.
Discover office canvas art designed to inspire productivity and enhance professional backgrounds.
Hallway and Corridor Wall Art Placement Techniques
Hallways present unique challenges with narrow dimensions and transitional purposes. Strategic art placement transforms these often-neglected spaces into galleries.

Single-Wall Hallway Arrangements
Line up multiple pieces horizontally along hallway walls, maintaining consistent height at 57 inches to each center. This creates a gallery effect that guides movement through the space.
Space pieces 24 to 36 inches apart in hallways. This wider spacing accommodates the narrow viewing distance as people walk past.
Choose pieces that relate through color, style, or theme. Hallways showcase collections beautifully when individual works share visual connections.
End-Wall Focal Points
Hallways ending with a visible wall offer prime focal point opportunities. Position a statement piece at the hallway's terminus to draw the eye forward.
This end-wall placement can go slightly larger than individual hallway pieces. The increased viewing distance from the hallway entrance allows for greater scale.
Ensure adequate lighting in hallways, particularly for end-wall focal pieces. Track lighting or strategically placed sconces illuminate artwork that might otherwise disappear in shadowy corridors.
Professional Hanging Hardware and Installation Best Practices
Proper hardware ensures artwork hangs securely and level. Professional installation techniques prevent damage and support long-term display.

Selecting Appropriate Hardware
Match your hanging hardware to wall type and artwork weight. Drywall requires different solutions than plaster, concrete, or brick walls.
Standard picture hooks work for pieces under 20 pounds on drywall. Heavier pieces demand wall anchors or toggle bolts that distribute weight across larger areas.
Two hooks spaced 8 to 12 inches apart provide more stability than single-point hanging, particularly for wider pieces over 24 inches.
Using Proper Installation Tools
A quality level is essential for straight installations. Digital levels provide precise readings and eliminate guesswork.
Mark both your desired height and level position with light pencil marks before making any holes. Measure twice, drill once prevents costly wall repair.
Stud finders locate solid anchoring points in drywall. Whenever possible, anchor into wall studs for maximum support and security.
Essential Installation Supplies
- Laser or bubble level for perfect alignment
- Measuring tape for accurate placement
- Pencil for temporary marking
- Stud finder for locating anchoring points
- Appropriate hooks or anchors for weight
- Hammer or drill depending on wall type
Installation Safety Tips
- Always secure heavy pieces with two hooks
- Test hook strength before hanging valuable art
- Use wall anchors in drywall for anything over 15 pounds
- Check that hanging wire is rated for artwork weight
- Avoid hanging heavy pieces above beds or seating
- Inspect hardware annually for wear or loosening
Achieving Level Placement
Hang artwork slightly forward-tilted using bumpers or felt pads on bottom corners. This subtle angle prevents pieces from shifting and reduces wall shadows.
For gallery walls, start with the central anchor piece and work outward. Check level frequently as you add pieces to catch alignment issues early.
If a piece hangs crooked, resist the urge to eyeball adjustments. Remove it, verify your hook placement with a level, and rehang properly.
Common Wall Art Placement Mistakes to Avoid
Understanding frequent placement errors helps you achieve professional results. Recognizing these mistakes before hanging saves time and prevents damage.

The Too-High Hanging Error
Hanging art too high ranks as the most common placement mistake. Pieces floating near the ceiling disconnect from furniture and human scale.
Many homeowners instinctively center art on the wall itself rather than at eye level. This pushes pieces upward, particularly on walls with high ceilings.
Always measure from the floor up to 57 inches rather than down from the ceiling. This floor-first approach ensures consistent, appropriate height regardless of ceiling height.
Incorrect Sizing for Spaces
Art that's too small for the space disappears and fails to make an impact. Undersized pieces above large furniture look insignificant and unintentional.
Conversely, oversized art overwhelms rooms and creates visual imbalance. Pieces should relate proportionally to both the wall space and surrounding furniture.
Use the two-thirds rule as your guide. Artwork should span approximately two-thirds of the furniture width below it for balanced proportions.
Poor Spacing and Grouping Decisions
Inconsistent spacing between multiple pieces creates amateurish appearances. Gallery walls need uniform gaps to achieve professional polish.
Hanging too many pieces in a small space clutters the room and dilutes the impact of each individual work. Embrace negative space as a design element.
Avoid the "postage stamp" effect of tiny pieces scattered across a large wall. Group small pieces together in gallery arrangements or choose appropriately scaled individual works.
Placement Best Practices
- Center artwork at 57 inches from floor
- Maintain 6-8 inches spacing above furniture
- Use consistent 2-3 inch gaps in gallery walls
- Choose art spanning 2/3 of furniture width
- Consider viewing angle (seated vs standing)
- Plan layout on floor before hanging
Common Placement Errors
- Hanging art too high near ceilings
- Undersized pieces above large furniture
- Inconsistent spacing in arrangements
- Ignoring furniture proportions below
- Cluttering walls with too many pieces
- Making permanent holes without testing placement
Styling Wall Art by Type and Medium
Different art types require specific placement approaches. Understanding these nuances helps you showcase each medium to its best advantage.

Canvas Print Placement Considerations
Canvas prints offer versatility with their frameless, wrapped edges. These pieces work beautifully in modern and traditional spaces alike.
The depth of stretched canvas adds dimension to walls. Position canvas pieces where side lighting can highlight this three-dimensional quality.
Multiple canvas pieces from the same series or collection create cohesive statements. Triptychs and diptychs should be hung with minimal spacing of 1 to 2 inches between panels.
Browse our complete collection of canvas prints featuring museum-quality printing on premium materials.
Framed Art and Photography
Framed pieces with glass require placement away from direct sunlight to prevent glare and UV damage. Position these works on walls perpendicular to windows when possible.
Heavy frames need robust hanging hardware. Always use wire and hooks rated above your piece's weight for safety and security.
Mix frame colors within gallery walls by establishing a color palette. Limit yourself to two or three frame finishes maximum for cohesive collections.
Original Paintings and Mixed Media
Original paintings often feature unique dimensions and depth. Give these one-of-a-kind pieces prominent placement as room focal points.
Textured mixed media works benefit from directed lighting that emphasizes surface variation. Picture lights or adjustable track lighting work well for this purpose.
Protect valuable original art from environmental factors. Avoid placement near heating vents, humid bathrooms, or direct sun exposure that can damage pigments over time.
Explore original paintings by Chiara Rossetti for unique statement pieces worthy of prominent placement.
Three-Dimensional Wall Sculptures
Wall sculptures add architectural interest and depth. These pieces cast shadows that change throughout the day with natural light movement.
Position sculptures with adequate surrounding negative space. Three-dimensional works need breathing room to showcase their form without visual competition.
Consider sight lines from multiple angles when hanging sculptural pieces. Unlike flat art, sculptures present different views from various positions in the room.
Discover modern sculptures that add dimensional interest to your walls beyond traditional flat artwork.
Creating Flexible Systems for Rotating Art Displays
Rotating artwork keeps interiors fresh and allows you to showcase different pieces seasonally. Strategic systems make changing displays simple.

Picture Rail and Track Systems
Picture rails mounted near ceiling height allow artwork to hang from adjustable cables. This system eliminates the need for new holes with each arrangement change.
Cable systems work particularly well in rentals or spaces where wall damage must be minimized. The cables become nearly invisible from normal viewing distances.
Adjust cable lengths to maintain the 57-inch eye-level standard even when using rail systems. The hanging point changes but the viewing height remains constant.
Removable Adhesive Solutions
Command strips and other removable adhesive hangers work for lightweight pieces under 5 pounds. These solutions suit renters or those hesitant about making holes.
Follow manufacturer weight limits precisely. Exceeding rated capacities leads to falling art and potential damage to both pieces and walls.
Adhesive solutions work best on smooth, painted drywall. They may fail on textured walls, wallpaper, or freshly painted surfaces that haven't fully cured.
Planning Seasonal Rotations
Photograph your current arrangements before taking pieces down. These images serve as reference points if you want to recreate successful layouts later.
Store rotated artwork properly by wrapping pieces in acid-free paper or bubble wrap. Keep them in climate-controlled spaces away from moisture and temperature extremes.
Consider seasonal color palettes when planning rotations. Warmer tones for fall and winter, cooler palettes for spring and summer create subtle connections to changing seasons.
Ready-to-Hang, Museum-Quality Canvas
Every Rossetti Art canvas print arrives ready to hang with no installation guesswork. Free worldwide shipping on all orders. Museum-quality materials designed and curated by Chiara Rossetti.
- Premium canvas with gallery-grade printing
- Ready-to-hang hardware included
- Perfect sizing for standard placement rules
- Free worldwide shipping on every order
Frequently Asked Questions About Wall Art Placement
How high should you hang art on a wall?
The center of your artwork should sit at 57 inches from the floor to the center point of the piece. This measurement represents average human eye level and creates proper visual balance in most spaces. For dining rooms where people sit, lower this by 4 to 6 inches to account for seated eye level.
How much space should be between wall art and furniture?
Leave 6 to 8 inches between the top of your furniture and the bottom edge of your artwork. This spacing creates visual connection without crowding. For particularly large furniture pieces, you can extend to 10 inches maximum while maintaining the relationship between the two elements.
What size art should go above a sofa?
Your artwork width should measure between two-thirds and three-quarters of your sofa's width. For a 90-inch sofa, choose art spanning 60 to 67 inches. This proportion creates balance without overwhelming the furniture or appearing too small for the space.
How do you arrange multiple pieces of wall art?
Treat multiple pieces as a single unit when arranging gallery walls. Maintain consistent 2 to 3 inch spacing between all frames. Center the entire grouping's midpoint at 57 inches from the floor. Use paper templates to plan layout on the floor first before committing to wall placement.
Should wall art be centered on the wall or above furniture?
Center artwork relative to the furniture below it, not the entire wall. This creates a visual relationship between the art and furniture that feels cohesive. If no furniture sits below, then center the piece on the wall itself while maintaining the 57-inch eye-level height.
How far apart should pictures be in a hallway?
Space pieces 24 to 36 inches apart in hallways, which is wider than typical gallery wall spacing. This increased distance accommodates the narrow viewing distance as people walk past. Maintain consistent height at 57 inches to each piece's center for a professional gallery effect.
What is the rule for hanging pictures above a bed?
Position artwork so the bottom edge sits 5 to 9 inches above your headboard. Center the piece horizontally with the bed's midpoint. Choose artwork spanning roughly two-thirds of your headboard width to maintain proper proportions in the bedroom space.
Can you hang art too low?
Yes, hanging art too low creates disconnection from natural sight lines and makes spaces feel bottom-heavy. The 57-inch eye-level rule exists because this height creates optimal viewing angles for most adults. Exceptions include dining rooms where seated viewing requires slightly lower placement.
What is the best way to hang canvas prints?
Canvas prints typically come with pre-installed hanging hardware. Use two hooks spaced 8 to 12 inches apart for pieces wider than 24 inches to prevent tilting. For heavy canvases over 20 pounds, use wall anchors or toggle bolts in drywall rather than standard picture hooks.
Should all frames in a gallery wall be the same size?
No, varied sizes create visual interest in gallery walls. Mix sizes while maintaining consistent spacing of 2 to 3 inches between all pieces. Choose frames in the same color family even when varying sizes and styles. Aim for balance by distributing larger and smaller pieces throughout the arrangement rather than clustering all large pieces together.
Final Thoughts on Wall Art Placement
Mastering wall art placement transforms ordinary rooms into thoughtfully designed spaces. The eye-level rule, proper spacing, and furniture relationships create professional results.
Start with the 57-inch eye level standard. Adjust for specific rooms and situations, but let this measurement guide your initial placement. Measure from the floor first rather than the ceiling.
Consider proportions carefully. Art should relate to both the wall space and the furniture below it. The two-thirds rule provides reliable guidance for sizing decisions.
Don't rush the placement process. Use paper templates and temporary mounting to test arrangements before making permanent holes. These extra steps prevent regret and save walls.
Remember that negative space matters as much as the art itself. Resist the urge to fill every wall. Strategic restraint allows your chosen pieces to shine.
For additional design inspiration and tips, explore our blog featuring articles on art styling, color coordination, and room-specific placement strategies.
Quality artwork deserves proper placement. When you invest in pieces you love, take the time to display them correctly using these designer-approved principles.

Leave a comment
This site is protected by hCaptcha and the hCaptcha Privacy Policy and Terms of Service apply.