

Transforming a child's room through wall painting creates more than just visual appeal. It shapes their daily environment, influences their mood, and sparks imagination during formative years. Every parent faces the challenge of choosing the right colours and designs that will nurture creativity while standing the test of time as their little ones grow.
The walls surrounding your child become their personal canvas for dreams and play. Whether you're expecting a new arrival or refreshing a space for your growing child, understanding how colour psychology, design themes, and practical considerations come together makes all the difference. This guide walks you through everything from selecting the perfect paint shades to incorporating complementary wall art that brings the entire room to life.
From understanding which colours promote calm sleep to discovering themes that inspire learning, you'll find practical advice backed by child development research and real-world design experience. Let's explore how to create a bedroom environment where your child feels safe, inspired, and excited to spend time.
Understanding Color Psychology for Children's Spaces

Colour impacts how children feel, learn, and rest in their personal space. Research in environmental psychology shows that specific shades can either stimulate activity or promote relaxation. Understanding these effects helps you make informed choices when selecting room paint for your child's bedroom.
Blue tones consistently rank among the most popular choices for children's rooms because they promote calmness and reduce anxiety. Lighter blues create a serene atmosphere perfect for bedtime routines, while deeper navy shades add sophistication that transitions well into teenage years. Studies show that children surrounded by cool blue tones fall asleep faster and experience better sleep quality.
Warm Colors and Their Effects on Child Development

Warm colours like yellow, orange, and pink stimulate energy and creativity. Yellow enhances concentration and promotes cheerful moods, making it ideal for play areas or study corners. However, too much bright yellow can overstimulate young children, so balance becomes essential. Consider using softer butter yellow or cream shades as base colours with brighter yellow accents.
Pink remains a classic choice that works beyond traditional gender associations. Soft pink creates a nurturing environment and has calming properties similar to light blue. Modern design trends embrace pink in sophisticated ways through muted rose, blush, and coral tones that feel contemporary rather than stereotypical.
Orange combines the energy of red with the happiness of yellow. It encourages social interaction and enthusiasm, perfect for children who love hosting playdates. Use orange strategically as an accent wall colour rather than covering all four walls to prevent overwhelming the space.
Cool and Neutral Tones for Versatile Spaces

Green connects children with nature and provides a balanced middle ground between warm and cool tones. It reduces stress and improves reading ability, making it an excellent choice for children's bedrooms that double as study spaces. Sage green, mint, and soft olive create sophisticated rooms that grow beautifully with your child.
Neutral colours including gray, beige, and soft white offer the most flexibility for changing decor as children grow. These shades create a calming backdrop that allows furniture, textiles, and wall art to take centre stage. When working with neutral room paint, introduce personality through colourful canvas prints and accessories that can easily update as tastes evolve.
Purple stimulates imagination and creativity while promoting calm. Lighter lavender works wonderfully in nurseries and young children's rooms, while deeper purple shades suit older children interested in art and creative pursuits. Purple pairs beautifully with gray or white for a balanced colour scheme.
Energizing Colors for Active Children
Children with high energy levels benefit from strategic colour placement that channels enthusiasm productively.
- Yellow promotes concentration in study areas
- Orange encourages social play and creativity
- Red accents stimulate activity (use sparingly)
- Bright green supports active play while maintaining balance
Calming Colors for Sensitive Children
Children who feel overwhelmed easily need environments that promote security and tranquility.
- Soft blue reduces anxiety and promotes sleep
- Lavender creates peaceful, nurturing spaces
- Pale pink offers comfort and warmth
- Sage green provides natural calm
Creating Colour Harmony With Multiple Shades

Single-colour rooms can feel flat and unstimulating for young minds. Creating depth through a thoughtful colour scheme adds visual interest without overwhelming the space. The 60-30-10 rule provides a reliable framework: use your main colour for 60% of the room (typically walls), a secondary colour for 30% (furniture, larger decor items), and an accent colour for 10% (accessories, artwork).
When combining colours, consider how they interact on the colour wheel. Analogous colours (neighbours on the wheel like blue and green) create harmonious, peaceful spaces. Complementary colours (opposites like blue and orange) generate energy and visual excitement. For children's rooms, analogous schemes typically work better for promoting rest while complementary accents add playful energy.
Don't forget about white and how it functions in your colour scheme. White ceilings help rooms feel larger and brighter, while white trim creates clean transitions between wall colours. If your walls feature bold shades, white furniture provides visual rest for the eyes.
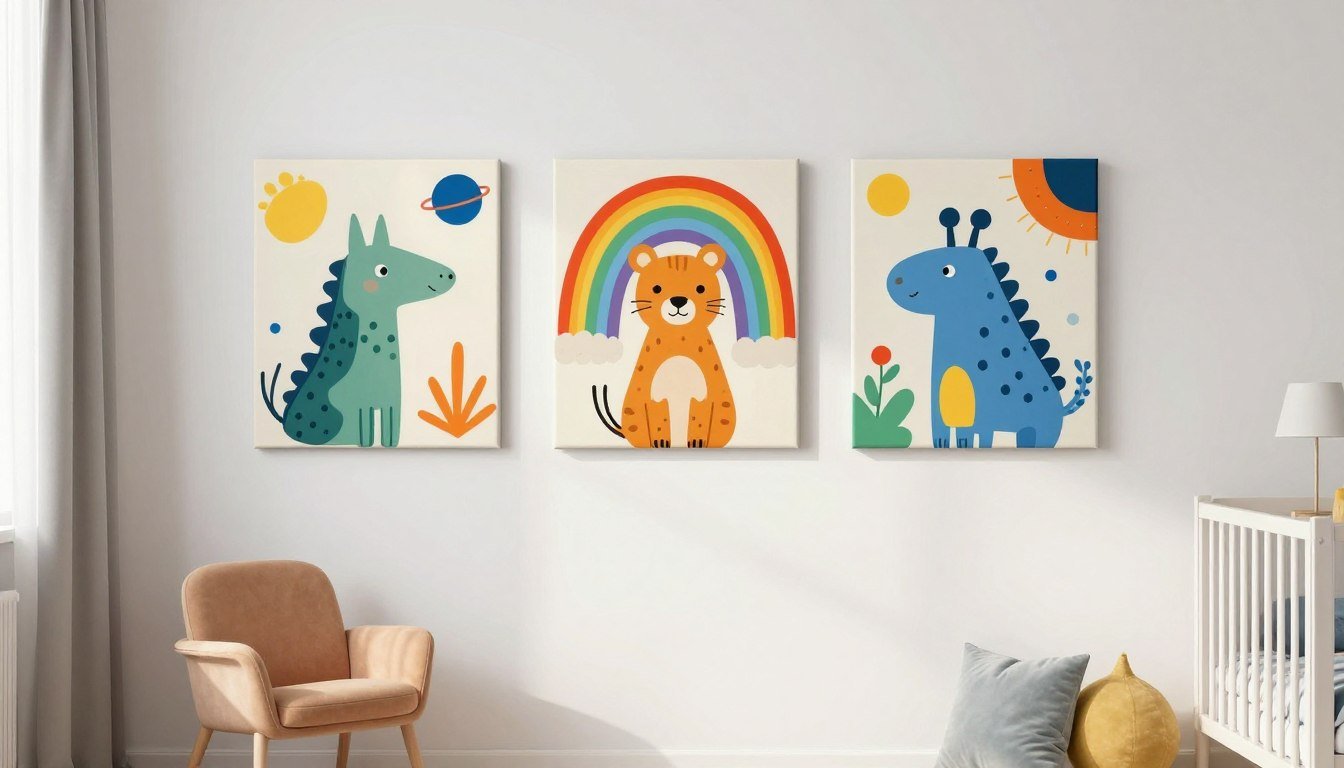
If You Love Whimsical Themes, Here Are 3 Prints That Bring Imagination to Life
Complement your painted walls with ready-to-hang canvas art designed specifically for children's spaces. These museum-quality prints add personality without the commitment of permanent paint.

Playful Animal Kingdom Print
Soft watercolor animals in gentle colours create a nurturing environment for young children. These designs grow with your child from nursery to elementary years.

Abstract Learning Shapes
Geometric patterns in bright primary colours stimulate visual development and introduce basic shapes. Perfect for play areas and learning corners.

Botanical Dreams Collection
Gentle botanical illustrations in muted greens and creams bring nature indoors. These prints create peaceful environments perfect for rest and reading.
Age-Appropriate Design Themes That Evolve

Children's interests change rapidly as they grow. Selecting painting ideas and themes that transition smoothly through developmental stages saves money and reduces the need for frequent redecoration. Strategic design choices create rooms that feel appropriate whether your child is two or twelve.
Nursery Design for Newborns to Toddlers
Newborns have limited vision that develops rapidly during their first year. Soft, muted colours in the nursery create a soothing environment for both baby and parents during late-night feedings. Avoid high-contrast patterns or very bright shades that can overstimulate infants.
Cream, soft gray, pale blue, and gentle pink work beautifully as base colours for nurseries. These neutral foundations allow you to introduce personality through removable elements like wall decals, fabric wall hangings, or nursery canvas prints that can change as your child grows into toddlerhood.

As babies become mobile toddlers, their environment should encourage exploration. Consider adding a chalkboard paint section on one wall where little ones can express creativity without worrying about making permanent marks. This practical feature entertains toddlers while containing artistic expression to designated areas.
Toddler rooms benefit from slightly brighter colours than nurseries since children this age engage more actively with their surroundings. Introduce secondary colours through furniture, bedding, and wall art rather than committing to bold paint on all walls. This approach maintains flexibility as preferences emerge.
Preschool and Early Elementary Designs

Children aged three to eight develop strong preferences about their spaces. They become interested in specific themes like dinosaurs, space, princesses, or underwater worlds. While it's tempting to paint elaborate themed murals, consider how quickly these interests can change. A five-year-old obsessed with unicorns might feel differently at seven.
The smart way to honour current interests involves painting walls in coordinating solid colours while bringing themes to life through changeable elements. For example, if your child loves outer space, paint walls in navy or deep blue and add rocket ship canvas prints, star decals, and space-themed bedding. When interests shift, you simply swap the accessories rather than repainting entire rooms.
This age group benefits from incorporating educational elements into room design. Consider a world map wall decal on a neutral painted wall, or animal-themed wall art that teaches about different species. These touches make learning part of the daily environment without feeling like a classroom.

Color-Blocking Techniques for Growing Children
Colour-blocking creates sophisticated designs that appeal to a wide age range. This technique involves painting different sections of walls in complementary or contrasting colours rather than covering everything in one shade.
Try dividing a wall horizontally with a chair rail, painting the bottom two-thirds in a darker shade and the top lighter. This approach adds visual interest and can make rooms with low ceilings feel taller. Vertical colour blocking also works well, especially when you want to define different zones within a larger room.
Geometric colour blocking through triangles, hexagons, or abstract shapes creates modern, gallery-like walls that work from toddlerhood through teenage years. This design choice provides personality without committing to character-based themes that quickly date.
Preteen and Teen Rooms That Respect Growing Independence

As children approach their preteen years, their need for self-expression intensifies. They develop definite opinions about their space and want rooms that reflect their maturing tastes. This stage requires balancing their desire for bold choices with practical considerations about longevity.
Rather than dismissing a twelve-year-old's request for black walls, work together to find compromise solutions. Perhaps one accent wall in charcoal or navy satisfies their desire for drama while keeping the room bright enough for studying. Involving children in design decisions teaches them about planning, budgeting, and living with consequences of choices.
Sophisticated colour schemes work well for this age group. Deep teal, burgundy, forest green, or navy create grown-up atmospheres that teenagers appreciate. Pair these rich colours with crisp white trim and modern line art prints or black and white photography for spaces that could transition into young adult apartments.
Create distinct zones in teenage rooms through paint. A study area might feature a motivational colour like yellow or orange, while the sleeping area uses calming blues or greens. This functional approach to colour helps teenagers manage their time and activities within their personal space.
Practical Tips for Painting Children's Bedrooms

The physical process of painting a child's room requires more consideration than adult spaces. Children spend significant time in their rooms and their developing systems are more sensitive to chemicals found in traditional paints. Proper preparation, product selection, and technique ensure beautiful results that remain safe for your little ones.
Choosing Safe, Child-Friendly Paints
Paint selection significantly impacts indoor air quality and your child's health. Traditional paints release volatile organic compounds (VOCs) that can cause respiratory irritation, headaches, and other health concerns. Children breathe faster than adults and spend more time near walls during floor play, increasing their exposure to any chemicals.
Look for paints labelled zero-VOC or low-VOC when shopping for children's rooms. Brands like Benjamin Moore's Natura line, Sherwin-Williams Harmony, and Behr Premium Plus are formulated to minimize harmful emissions. These paints cost slightly more but provide peace of mind about air quality in spaces where your children sleep and play.

Paint finish matters as much as colour in children's rooms. Flat or matte finishes hide wall imperfections but don't clean well, making them impractical for spaces where sticky fingers and art projects happen. Semi-gloss finishes withstand scrubbing but show every flaw in wall texture. Eggshell or satin finishes offer the best balance for most children's bedrooms. They provide enough sheen to wipe clean while forgiving minor wall imperfections.
For areas that see heavy wear like around light switches or near doors, consider semi-gloss paint specifically in those zones while using eggshell for main walls. This strategic approach combines durability where needed with attractive finish elsewhere.
Surface Preparation for Long-Lasting Results
Proper wall preparation prevents problems like peeling paint and uneven colour. Start by removing all furniture from the room or moving it to the centre and covering it completely. Take down curtains, remove outlet covers, and protect floors with drop cloths. Proper preparation takes time but ensures professional-looking results.
Clean walls thoroughly before painting. Use a solution of warm water and mild detergent to remove dust, grease, and fingerprints. Pay special attention to areas around light switches where oils from hands accumulate. Allow walls to dry completely before proceeding. Any moisture trapped under new paint causes peeling and mildew problems.
Important: If your home was built before 1978, test for lead paint before sanding or scraping walls. Lead paint creates toxic dust dangerous to children. Professional lead abatement may be necessary in older homes.

Fill any holes, cracks, or dents with spackling compound. Let it dry according to manufacturer directions, then sand smooth. Larger repairs might require joint compound applied in multiple coats. Sand between coats for seamless results. Wipe away all dust with a damp cloth before priming or painting.
Prime walls before applying your final colour, especially when making dramatic colour changes or painting over dark shades with light ones. Primer helps paint adhere properly and ensures true colour in your final coats. Tinted primer works especially well when transitioning to significantly different colours because it reduces the number of finish coats needed.
Painting Techniques for Professional Results

Start by cutting in around edges, corners, and trim using a quality angled brush. Cut in sections you can complete within thirty minutes so the edge stays wet when you roll the main wall area. This technique prevents visible lines between brushed and rolled sections.
Use a roller with appropriate nap length for your wall texture. Smooth walls work best with 3/8-inch nap while textured walls need 1/2-inch or thicker nap to reach into crevices. Apply paint in W-shaped patterns, then fill in without lifting the roller from the wall. This method distributes paint evenly and prevents roller marks.
Most rooms need two coats of paint for even colour coverage. Allow the first coat to dry completely according to paint manufacturer recommendations before applying the second. Inspect your work in both natural daylight and artificial lighting to catch any thin spots or imperfections you can address with touch-ups.
Essential Painting Supplies Checklist
- Low-VOC or zero-VOC paint in chosen colours
- Primer (tinted if making dramatic colour change)
- Paint rollers and roller covers in appropriate nap length
- Angled paint brushes for cutting in edges
- Painter's tape for protecting trim and creating clean lines
- Drop cloths to protect floors and furniture
- Paint trays and liners for easy cleanup
- Spackling compound and putty knife for repairs
- Sandpaper in various grits for wall prep
- Cleaning supplies for washing walls before painting
Common Painting Mistakes to Avoid
- Skipping primer when changing colours dramatically
- Not allowing enough drying time between coats
- Using cheap brushes that shed bristles into paint
- Overloading rollers causing drips and uneven coverage
- Painting in poor lighting that hides imperfections
- Removing painter's tape before paint fully dries
- Neglecting to ventilate room properly during painting
- Choosing paint finish inappropriate for the room's use
- Starting to paint without proper wall preparation
- Not testing paint colours on walls before committing
Creating Special Paint Effects and Features

Accent walls add visual interest without overwhelming a space. Choose one wall to paint in a bolder colour while keeping remaining walls neutral. The wall behind the bed typically works well as an accent wall, creating a focal point that frames the sleeping area. This approach lets you experiment with adventurous colours while maintaining balance in the room.
Ombre painting techniques create gradient effects that transition from dark to light or blend multiple colours together. This sophisticated look works beautifully in children's rooms and appeals across ages. While ombre painting requires patience and blending skills, the stunning results justify the extra effort. Alternatively, achieve similar effects with pre-designed wallpapers or wall murals if hand-painting feels too challenging.
Chalkboard paint transforms sections of wall into creative surfaces where children can draw and write freely. This paint comes in traditional black plus many colours to coordinate with your room scheme. Apply chalkboard paint to a framed section of wall, inside a closet door, or on a large board mounted to the wall. Remember that chalkboard surfaces need seasoning before first use (rub chalk over the entire surface then erase) to prevent permanent ghosting.

Magnetic paint creates surfaces that hold magnets, perfect for displaying artwork and important reminders. Apply magnetic primer under your chosen topcoat colour. Note that magnetic paint requires multiple coats (often three to four) to achieve strong magnetic hold. This specialty feature works especially well in study areas or craft corners where children need to post schedules, homework, or creative projects.
Match This Vibe to Your Space
Explore curated collections designed specifically for children's rooms. From playful patterns to sophisticated designs that grow with your child, find the perfect complement to your painted walls.

Discover Our Kids Room Collections
Every piece in our children's collection has been carefully selected to complement popular paint colours and room themes. Whether you're creating a peaceful nursery or an energetic play space, find artwork that enhances your vision.
- Age-appropriate designs from newborn to teen
- Coordinates with popular paint colour schemes
- Educational and imaginative themes
- Museum-quality materials safe for children's spaces
Visual Design Inspiration for Your Child's Room
Sometimes seeing designs come to life provides the inspiration needed for your own project. Watch these videos showcasing real children's room transformations and design techniques that bring painted walls and complementary decor together beautifully.
This video demonstrates how colour choices impact the overall mood and functionality of children's spaces. You'll see practical examples of paint application, accent wall creation, and how wall art integrates into the final design.

Transformation projects demonstrate what's possible with thoughtful planning and execution. Notice how successful designs balance bold colour choices with neutral elements, create distinct zones for different activities, and incorporate both fixed features like paint with changeable elements like canvas prints and textiles.
This second video focuses on artistic details and finishing touches that elevate children's rooms from basic to extraordinary. Learn techniques for creating cohesive designs that reflect your child's personality while maintaining practical functionality.
Budget Planning for Children's Room Painting Projects

Creating a beautiful child's room doesn't require unlimited resources. Strategic planning helps you achieve stunning results while respecting budget constraints. Understanding where to invest and where to save ensures money spent delivers maximum impact on the final space.
Calculating Paint and Material Costs
Most standard-sized children's bedrooms measuring ten by twelve feet require approximately two gallons of paint for two coats on walls. If you're painting the ceiling as well, add another gallon. Accent walls or special features may require additional paint in different colours. Calculate your needs precisely by measuring wall square footage and checking coverage information on paint cans.
Quality paint costs more upfront but provides better coverage, durability, and lower VOC emissions. A gallon of premium low-VOC paint ranges from forty to seventy dollars depending on brand and finish. Budget options cost less but may require additional coats and won't wear as well in high-traffic children's spaces. For rooms you're painting yourself, investing in better paint often proves more economical than buying cheap paint requiring extra coats.
| Item | Estimated Cost | Budget-Friendly Option | Premium Option |
| Paint (2 gallons) | $80-140 | Store brand low-VOC | Benjamin Moore Natura, Sherwin-Williams Harmony |
| Primer (1 gallon) | $25-40 | Basic primer for minor colour changes | Tinted primer for dramatic changes |
| Painting supplies | $30-60 | Reuse rollers, basic brushes | Quality brushes, premium roller covers |
| Wall preparation | $10-30 | Basic spackling and sandpaper | Professional repair compound, quality prep tools |
| Specialty finishes | $20-50 | Skip or DIY simple designs | Chalkboard paint, magnetic primer, stencils |
| Total DIY project | $165-320 | $165-200 for basic refresh | $280-320 for complete transformation |
Professional painting services cost significantly more but save time and ensure flawless results. Expect to pay between three hundred and eight hundred dollars for professional painting of a standard children's bedroom depending on your location, wall condition, and design complexity. Get multiple quotes and ask specifically about low-VOC paint options and experience with children's rooms.
Phased Approach for Limited Budgets

If budget constraints prevent completing everything at once, prioritize projects in phases. Start with painting walls in your chosen colours since this makes the biggest visual impact. Complete painting and basic room setup first, then add decorative elements like canvas prints and accessories over time as budget allows.
Phase one focuses on paint, wall preparation, and essential furniture. Phase two adds window treatments, area rugs, and primary decor pieces. Phase three introduces personality through wall art, decorative storage solutions, and special lighting. This staged approach spreads costs over several months while allowing your child to enjoy a refreshed space immediately.
Consider DIY options for significant savings. Painting yourself saves hundreds of dollars in labour costs. If you lack confidence in your painting skills, practice techniques on poster board before tackling walls. Watch tutorial videos and read detailed guides to improve your technique. The satisfaction of creating your child's space yourself adds value beyond mere cost savings.
Where to Invest and Where to Save
Invest in quality paint, proper primer, and good preparation materials. These fundamentals determine how long your paint job lasts and how healthy the environment remains for your child. Skimping here leads to poor coverage, peeling paint, and potential health concerns from high-VOC products.
Save money on painting tools if you won't use them frequently. A basic paint roller and tray work fine for most projects without buying expensive systems. Painter's tape, drop cloths, and disposable liners keep costs down while protecting your home during the project.
Smart Savings Strategies
- Buy paint during seasonal sales (spring and fall typically offer best deals)
- Check for "oops paint" or custom colours returned to stores at steep discounts
- Use samples to test colours before buying full gallons
- Borrow or rent specialty tools like paint sprayers rather than purchasing
- Complete all painting in one session rather than multiple weekends to reduce waste
- Buy multi-purpose primer that works on various surfaces
- Choose paint finish that cleans easily to extend lifespan
- Invest in removable wall art rather than painted murals that cost money to change

Wall art represents an area where smart shopping creates impact without overspending. Rather than expensive custom murals, choose ready-to-hang canvas prints that deliver professional results at accessible prices. Quality canvas art transforms rooms immediately and can move to new spaces as children grow. Visit our canvas prints collection to explore affordable options perfect for children's rooms.
Safety Considerations for Children's Bedroom Painting

Children's developing bodies are more vulnerable to chemical exposure than adults. Creating a safe environment during and after painting protects their health while ensuring the room becomes a healthy sanctuary for years to come.
Chemical Safety and VOC Considerations
Volatile organic compounds in traditional paints release gases that cause respiratory irritation, headaches, dizziness, and allergic reactions. These emissions peak immediately after painting but can continue at lower levels for months. Children's faster breathing rates and lower body weights make them particularly susceptible to these effects.
Select paints certified by third-party organizations like Green Seal or GREENGUARD which verify low chemical emissions and safety standards. These certifications require rigorous testing and ensure paints meet stringent health criteria. While certified paints cost slightly more, they provide crucial protection for vulnerable young lungs.
Important Safety Note: Keep children and pets completely out of rooms being painted. Don't allow them to return until paint has fully dried and rooms have been properly ventilated for at least 72 hours. Even low-VOC paints release some fumes during initial drying.
Proper ventilation during and after painting dramatically reduces chemical exposure. Open all windows and use fans to create cross-ventilation that pulls fresh air in and pushes paint fumes out. If weather doesn't permit open windows, use air purifiers with activated carbon filters designed to remove VOCs. Continue ventilating the room for several days after painting completes.
Physical Safety During and After Painting

Secure all furniture safely during painting to prevent tipping accidents. Move heavy items away from walls or to the room's centre and cover them completely. Ensure nothing can topple if a curious child manages to enter the space. Lock painting supplies including paints, thinners, and tools away from children both during the project and after completion.
Cover or remove electrical outlets before painting. Paint splattered on outlets creates shock hazards and fire risks. Replace outlet covers only after paint has completely dried. Check that no paint has entered outlets or switches before restoring power to the room.
Inspect all painted surfaces for lead paint if your home was built before 1978. Lead paint is extremely toxic to children and requires professional abatement, not DIY removal. Never sand or scrape surfaces that might contain lead paint as this creates dangerous lead dust that children can inhale or ingest. Testing kits are available at hardware stores for under twenty dollars.
Ongoing Safety Features to Consider
Choose paint with antimicrobial additives that resist mould and mildew growth. These properties matter especially in humid climates or rooms with moisture concerns. Mould exposure causes respiratory problems and allergic reactions in children. Paint designed to resist mould growth provides an extra layer of protection.
Consider non-toxic, washable paint formulated specifically for children's spaces. These paints withstand repeated cleaning without releasing harmful chemicals when wiped down. The ability to clean walls safely matters in rooms where children eat snacks, do crafts, or touch walls with messy hands.
Ensure adequate lighting in painted rooms. Poor lighting causes eye strain and makes rooms feel dreary. Paint finish affects how light reflects. Lighter colours and slight sheens bounce light around rooms making them feel brighter and more spacious. If painting rooms in darker colours, compensate with additional lighting to maintain a safe, functional space.
Complementary Decor Elements That Complete the Look

Paint establishes your room's foundation, but complementary elements bring the design to life. Thoughtfully chosen furniture, textiles, lighting, and wall art work together creating spaces that feel complete and intentional rather than thrown together.
Furniture Placement and Selection
Furniture arrangement affects how paint colours appear in the room. Dark furniture against light walls creates pleasant contrast and makes pieces stand out. Light furniture against bold wall colours lets the walls become the focal point. Consider these relationships when selecting furniture finishes that coordinate with your painted walls.
White or natural wood furniture offers maximum flexibility as paint colours change over time. These neutral furniture tones work with virtually any wall colour allowing you to refresh paint without replacing expensive furniture pieces. If your child gravitates toward colourful furniture, keep walls neutral so rooms don't become overwhelming.

Create distinct zones through furniture placement enhanced by your paint choices. A reading nook in a corner painted soft blue feels naturally calming, while a play area near walls painted in energetic yellow encourages active fun. Use furniture to define these zones while paint reinforces their purpose.
Scale matters when selecting children's furniture. Oversized pieces overwhelm small rooms regardless of paint colour. Choose appropriately sized furniture that leaves open floor space for play. Low furniture allows painted walls to become prominent design features rather than hidden behind tall pieces.
Textiles and Soft Furnishings
Bedding, curtains, rugs, and throw pillows introduce patterns and additional colours that complement your painted walls. These soft elements add warmth and comfort while tying your colour scheme together. Choose textiles that echo your wall colours in different shades or introduce coordinating accent colours from your overall palette.
Window treatments control natural light affecting how paint colours appear throughout the day. Sheer curtains allow maximum light making colours appear brighter and more vibrant. Blackout curtains support sleep quality while making colours appear deeper. Layer different curtain types for flexibility in light control while maintaining your design aesthetic.

Bedding Coordination
Select bedding that picks up accent colours from your walls rather than matching exactly. This creates visual interest while maintaining cohesion. For blue walls, consider bedding with blue, white, and yellow for a fresh look.

Area Rugs
Rugs ground furniture arrangements and add softness underfoot. Choose rugs that introduce patterns and textures complementing your paint. Washable rugs prove practical in children's spaces prone to spills.

Window Treatments
Curtains frame views while contributing to your colour scheme. Solid curtains in accent colours create bold statements. Patterned curtains incorporating your wall colours tie everything together beautifully.
Wall Art and Decorative Accessories
Wall art provides the finishing touch that personalizes children's rooms beyond paint alone. Canvas prints, framed posters, and decorative items introduce themes and interests while working within your colour palette. The key is balancing enough visual interest without creating cluttered chaos.
Group wall art in odd numbers (three or five pieces) for visual appeal following design principles. Create gallery walls that tell stories about your child's interests and achievements. Mix different sized pieces within consistent frames or mats for cohesive gallery arrangements. Canvas print sets offer pre-coordinated options that take guesswork out of creating gallery arrangements.

Decorative shelving displays books, toys, and special items while adding architectural interest. Floating shelves keep floors clear while providing storage and display space. Paint shelves to match trim for subtle integration or in accent colours to make them pop against your wall colour.
Three-dimensional wall decor adds depth and texture. Fabric pennant banners, paper decorations, or wooden letters spelling your child's name create personal touches. Ensure all wall decorations are securely mounted using appropriate hardware for your wall type to prevent accidents.
Lighting as a Design Element

Lighting transforms how paint colours appear and affects room functionality. Layer different light sources for flexibility. Overhead fixtures provide general illumination. Task lighting near desks or reading areas supports activities. Accent lighting highlights artwork or architectural features while creating ambiance.
Warm bulbs (2700-3000K) make yellows and reds appear richer while cooling blues and greens. Cool bulbs (4000-5000K) make blues and greens appear more vibrant while muting warm tones. Consider your wall colours when selecting bulb temperatures to ensure colours appear as intended.
Dimmer switches provide lighting flexibility as daily activities change. Bright light supports homework and play while dimmed lighting eases bedtime routines. LED bulbs work with dimmer switches, last longer, and stay cool reducing fire risk in children's rooms.
String lights or LED strips add whimsical touches children love. These accent lights come in many colours and can highlight architectural features or create cozy reading nooks. Ensure all electrical elements meet safety standards and keep cords secured away from play areas.
Ready-to-Hang, Museum-Quality Canvas. Free Worldwide Shipping.

Transform your freshly painted children's bedroom with professionally curated canvas art that complements your colour choices perfectly. Every piece in our collection features museum-quality materials, fade-resistant inks, and arrives ready to hang with all necessary hardware included.
We understand that decorating children's spaces requires art that's both beautiful and practical. Our canvas prints are:
- Printed on premium cotton-poly blend canvas for durability
- Stretched over solid wood frames that won't warp or bend
- Finished with protective coating resistant to moisture and UV damage
- Lightweight and secure for safe installation in kids' rooms
- Backed by our satisfaction guarantee
Choose from hundreds of designs specifically curated for children's spaces, organized by theme, colour palette, and age appropriateness. Whether you need gentle nursery art or sophisticated pieces for teenagers, find exactly what completes your vision.
Maintaining Your Painted Children's Bedroom

Proper maintenance extends the life of your paint job while keeping children's rooms looking fresh and clean. Understanding appropriate cleaning methods for different paint finishes prevents damage while removing the inevitable marks and smudges that appear in active children's spaces.
Regular Cleaning and Spot Treatment
Dust painted walls monthly using a microfiber cloth or duster with extending handle to reach high areas. Regular dusting prevents buildup that makes walls look dingy over time. Pay attention to corners where dust and cobwebs accumulate.
Address marks and stains promptly before they set permanently. For most marks on eggshell or satin finishes, use a soft sponge or cloth dampened with warm water and mild dish soap. Gently blot rather than scrubbing aggressively which can damage paint finish. Rinse with clean water and pat dry immediately.
For stubborn marks like crayon or marker, specialized cleaners work better than standard household products. Magic erasers effectively remove many stains but use them sparingly as they're mildly abrasive and can dull paint finish with overuse. Always test any cleaner in an inconspicuous area before applying it to visible walls.
Paint Touch-Up Kit: Keep leftover paint in sealed containers labelled with room name and paint colour. Also save paint can lids showing colour information. Touch up small chips or marks as they occur rather than letting them accumulate. Store touch-up paint in temperature-controlled areas away from extreme heat or cold.
Protecting High-Traffic Areas

Certain areas experience more wear than others in children's rooms. Around doors, light switches, and at child height where hands touch walls frequently, paint shows wear faster. Apply an extra coat of paint or use semi-gloss finish in these zones for added durability and easier cleaning.
Install door stops to prevent doorknobs from hitting and damaging walls. Clear bumpers or wall guards protect corners where furniture might bump against walls during play. These inexpensive additions prevent damage requiring more expensive repairs later.
Chair rails serve both decorative and protective functions. Install them at about two-thirds wall height and use more durable paint finishes below where children touch walls most frequently. This two-tone approach looks intentional while providing practical protection.
When to Repaint
Most children's bedroom paint jobs last five to seven years before needing complete repainting. However, high-traffic rooms or those housing very young children might need refreshing sooner. Signs that repainting time has arrived include fading colour, numerous touch-ups creating patchwork appearance, difficulty removing stains, or major chips and peeling.
Rather than repainting everything, consider refreshing just accent walls or areas showing the most wear. This approach costs less while updating the room's appearance. If your child's interests have changed dramatically, strategic repainting offers opportunity to update themes without complete renovation.
Before deciding to repaint, assess whether a thorough cleaning would suffice. Washing all walls with appropriate cleaner for your paint finish can restore appearance dramatically. If walls still look tired after proper cleaning, plan your repainting project.
Eco-Friendly and Sustainable Painting Choices

Environmental consciousness influences how modern families approach home decoration. Choosing sustainable painting options reduces environmental impact while creating healthier spaces for children. Fortunately, eco-friendly choices no longer require sacrificing quality or colour selection.
Low-VOC and Natural Paint Options
Beyond standard low-VOC paints, completely natural paint options use plant-based ingredients like clay, chalk, and natural pigments. These paints eliminate petroleum-based chemicals entirely while providing beautiful colours and finishes. Brands specializing in natural paints include ECOS, BioShield, and AURO.
Natural paints cost more than conventional options but offer unique benefits. They're completely biodegradable, produce zero harmful emissions, and often improve indoor air quality rather than merely avoiding harm. The slightly higher investment pays dividends in health benefits and environmental responsibility.
Clay-based paints provide additional benefits including moisture regulation that helps prevent mould growth naturally. These paints work especially well in humid climates or rooms prone to moisture issues. The slight texture of clay paints creates visual depth that flat synthetic paints can't match.
Sustainable Painting Practices

Minimize waste during painting projects through careful planning and responsible disposal. Calculate paint needs precisely to avoid buying excess that goes unused. Most paint stores will tint small sample sizes allowing you to test colours before committing to full gallons, reducing waste from colour mistakes.
Leftover paint shouldn't go to waste or landfills. Store properly sealed containers for touch-ups and future projects. When you have paint you won't use, offer it through community sharing platforms or donate it to organizations like Habitat for Humanity that accept usable paint.
Dispose of unusable paint responsibly through hazardous waste collection programs. Never pour paint down drains or throw it in regular trash where it can contaminate water supplies. Contact your local waste management authority for paint disposal guidelines specific to your area.
Choose reusable painting supplies whenever possible. Invest in quality brushes and rollers that can be cleaned and used for multiple projects rather than disposable versions. Use washable drop cloths instead of plastic sheeting that becomes waste after single use.
Energy Efficiency Considerations
Paint colour affects room temperature and energy consumption. Lighter colours reflect more light and heat, keeping rooms cooler in warm climates and reducing air conditioning costs. In colder climates, deeper colours absorb heat helping warm spaces naturally.
Consider your home's orientation and climate when selecting colours. Rooms receiving intense afternoon sun benefit from cooler colours that reflect heat. North-facing rooms with limited natural light feel warmer and more inviting painted in warm tones.
Reflective paint additives improve energy efficiency by bouncing more light around rooms, reducing need for artificial lighting during daytime hours. While primarily marketed for exteriors, some interior paints incorporate heat-reflective technology that helps regulate room temperature naturally.
"Sustainable choices in children's room decoration create healthier spaces while teaching kids important values about environmental responsibility. When parents prioritize eco-friendly paints and materials, children learn through example that our choices impact the world around us."
Involving Children in the Design Process

Including children in design decisions creates rooms they truly love while teaching valuable life skills. The key is balancing their input with adult guidance that ensures practical, long-lasting results. Age-appropriate involvement makes children feel heard and invested in their spaces.
Age-Appropriate Involvement Strategies
Toddlers and preschoolers can choose between pre-selected options rather than unlimited choices that overwhelm them. Show three colour swatches you've already approved and let them pick their favourite. This guided choice gives them agency while ensuring results work within your overall home aesthetic.
Elementary-aged children can participate more fully in planning. Discuss their favourite colours, interests, and how they want to use their room. Create mood boards together using magazine clippings or online images. This collaborative process teaches decision-making while ensuring their voice is heard.

Teenagers deserve significant input into their room design. Their rooms become retreats where they develop independence and identity. Work collaboratively setting budget parameters and practical requirements, then let them lead design choices within those boundaries. This approach respects their growing autonomy while teaching real-world constraints.
For children of all ages, explain why certain choices work better than others. If your seven-year-old wants neon orange walls, discuss how bright colours can make sleeping difficult and suggest a compromise like orange accents with neutral main walls. This teaches critical thinking about how design affects daily life.
Creative Compromise Solutions
When children's desires conflict with practical concerns, creativity yields solutions satisfying everyone. Instead of painting all walls in their favourite bright purple, create a purple accent wall with neutral complementary walls. This honours their preference while maintaining a balanced space.
Temporary design elements allow children to express current interests without permanent commitment. Wall decals, removable wallpaper, or canvas prints featuring their favourite characters or themes can change easily as tastes evolve. Explain that paint provides the backdrop while changeable elements bring personality.
Teaching Moments Through Design Decisions
Room decoration offers opportunities to teach children valuable skills extending far beyond interior design. Through the process, they learn about:
- Budgeting and making financial trade-offs
- Planning projects from concept through completion
- Compromise and negotiation in family decisions
- How choices have long-term consequences
- Patience as projects unfold over time
- Taking care of things they helped create
- Expressing personal style within appropriate boundaries
These lessons prove more valuable than any specific paint colour. When children understand the reasoning behind design decisions, they develop critical thinking skills applicable throughout life. The room becomes a classroom for real-world problem-solving and creative expression.

Making it a Family Project
Painting together creates lasting memories while accomplishing practical goals. Even young children can help with age-appropriate tasks like stirring paint, laying drop cloths, or painting sections under supervision. The imperfections from their efforts add character and mean more than professional-perfect results.
Document the process through photos showing before, during, and after stages. These images become treasured memories of time spent together creating something meaningful. Children love seeing transformation through their efforts, building pride in their space and confidence in their abilities.
Celebrate completion with a reveal moment when your child sees their finished room for the first time. This memorable experience validates their input and the family's collaborative effort. Consider leaving a section where everyone signs their name or adds a handprint in paint before final furniture placement, creating a hidden family time capsule.
Troubleshooting Common Painting Problems

Even careful painting projects sometimes encounter problems. Understanding how to identify and fix common issues prevents minor problems from becoming major headaches requiring complete repainting.
Addressing Peeling and Bubbling Paint
Paint peeling or bubbling indicates moisture problems or poor adhesion. If peeling occurs shortly after painting, inadequate surface preparation likely caused the issue. Paint won't adhere properly to dirty, greasy, or glossy surfaces. The solution requires scraping off loose paint, properly preparing the surface, priming, and repainting affected areas.
Moisture-related peeling appears near windows, exterior walls, or bathrooms where humidity concentrates. Address the underlying moisture source before repainting. Improve ventilation, fix leaks, and ensure proper weatherization prevents moisture from penetrating walls. Once moisture problems are resolved, remove loose paint, treat area with mildew-killing primer if needed, and repaint.
Bubbling during or immediately after painting results from painting in too-hot conditions, applying paint too thickly, or painting over contaminants. If caught early, you can pop bubbles, smooth the area, and recoat. For widespread bubbling, unfortunately, you'll need to sand smooth and repaint.
Fixing Uneven Coverage and Streaking

Uneven coverage or visible brush and roller marks result from applying paint too thinly, inadequate primer, or technique issues. If you notice problems while paint is still wet, keep working the area with long, even strokes to blend and smooth. Once dried, apply additional coats using proper technique for even coverage.
Streaking occurs when you apply paint to areas that have already started drying. Maintain a wet edge by working quickly and systematically. Don't go back over sections that have begun to dry as this creates obvious marks. In hot, dry conditions, an extender additive slows drying time allowing more working time to blend edges.
Lap marks appear as stripes where new paint overlaps dried paint sections. Prevent this by planning your approach to paint entire walls without significant breaks. If you must pause, stop at natural breaking points like corners or room divisions rather than stopping mid-wall. Quality paint formulated to minimize lap marks helps prevent this problem.
Dealing with Color Issues
Paint colour looking different on walls than on the sample swatch frustrates many people. Colours appear different depending on lighting, surrounding colours, and paint finish. Before panicking, let paint dry completely and view it in various lighting conditions throughout the day. Colours often settle into their true appearance after full curing.
If colour remains unsatisfactory after drying completely, determine whether it's too light, too dark, or simply wrong. If too light, additional coats might deepen the colour sufficiently. If too dark or wrong tone entirely, you'll need to repaint with a different colour. Apply primer before switching colours dramatically different from your current shade.
| Problem | Cause | Prevention | Solution |
| Peeling paint | Poor surface prep, moisture issues | Clean and prime properly, address moisture sources | Remove loose paint, fix moisture source, prep and repaint |
| Paint bubbling | Painting in heat, applying too thickly | Paint in moderate temperatures, apply thin coats | Sand smooth when dry and apply thin additional coats |
| Uneven coverage | Inadequate primer, applying too thinly | Use quality primer, apply sufficient coats | Apply additional paint coats using proper technique |
| Roller marks | Wrong nap size, poor technique | Use correct roller nap, maintain even pressure | Lightly sand and apply additional coat with proper roller |
| Brush streaks | Cheap brushes, paint too thick | Use quality brushes, proper paint consistency | Lightly sand and repaint with quality brush |
| Wrong colour | Not testing in actual lighting | Test samples on walls, view in various lights | Prime and repaint if colour unacceptable after drying |
Preventing Future Problems
Most painting problems trace back to rushing preparation or skipping steps to save time. Invest time properly preparing surfaces, using appropriate primers, and applying sufficient coats. These fundamentals prevent the majority of painting issues requiring costly fixes later.
Store paint properly for future touch-ups. Pour leftover paint into smaller containers filled nearly to the top to minimize air exposure. Seal lids tightly and store in temperature-controlled locations away from freezing or extreme heat. Label containers clearly with room name, colour information, and date painted.
Maintain reasonable expectations about paint longevity in children's rooms. These spaces endure more wear than other areas of your home. Plan for touch-ups and eventual repainting as normal maintenance rather than indicators of failure. Regular attention prevents small issues from becoming major problems requiring extensive work.
Professional Painting vs DIY: Making the Right Choice

Deciding whether to hire professionals or tackle painting yourself depends on multiple factors including budget, time availability, skill level, and project complexity. Understanding pros and cons of each approach helps you make the choice that best serves your situation.
When DIY Makes Sense
Do-it-yourself painting saves significant money on labour costs. For simple projects involving standard wall painting in basic colours, homeowners with reasonable handiness can achieve satisfactory results. DIY projects also offer flexibility to work on your schedule without coordinating with contractors.
Painting provides satisfying hands-on accomplishment. Completing the project yourself creates pride of ownership knowing you personally created your child's space. This emotional benefit matters to many families beyond mere cost savings.
Simple room refreshes involving one or two coats of similar colours over existing paint work well as DIY projects. If you've painted before and feel comfortable with the process, straightforward repainting falls within most homeowners' capabilities. Modern quality paints are formulated to be user-friendly for non-professionals.
Advantages of DIY Painting
- Significant cost savings on labour
- Work on your own schedule
- Personal satisfaction and pride of ownership
- Control over every detail and decision
- Learn new skills applicable to future projects
- Involve children in family project
- No need to schedule and coordinate contractors
Disadvantages of DIY Painting
- Time-intensive process requiring multiple days
- Physical demands of painting large areas
- Risk of mistakes requiring costly corrections
- Learning curve affecting final quality
- Need to purchase or rent equipment
- Potential for less professional-looking results
- Responsibility for any problems that arise
When Professional Painters Are Worth the Investment

Complex projects involving extensive preparation, special techniques, or difficult-to-reach areas benefit from professional expertise. Painters possess specialized knowledge, professional-grade equipment, and years of experience producing flawless results efficiently.
Time-constrained families benefit tremendously from professional services. What might take you multiple weekends can be completed by professionals in one or two days. If your schedule doesn't permit extended painting projects, hiring professionals makes practical sense despite higher cost.
Homes with lead paint, significant wall damage, or moisture problems require professional assessment and remediation. These issues demand expertise beyond typical homeowner knowledge. Professionals can identify underlying problems and address them properly before painting.
Special finishes like Venetian plaster, textured applications, or elaborate colour blocking benefit from professional skills. While you might successfully paint solid colours, complex techniques require experience and specialized tools for quality results. Don't risk disappointing outcomes on techniques beyond your skill level.
Hybrid Approach: Combining DIY and Professional Services
Consider hybrid approaches that leverage professional expertise for challenging aspects while handling simpler tasks yourself. For example, hire professionals for preparation work, primer application, and complex areas while handling final colour coats yourself. This approach reduces costs while ensuring proper foundation for your painting project.
Professional colour consultations provide expert guidance even if you paint yourself. For reasonable fees, colour specialists assess your space, suggest colour palettes, and provide specific paint recommendations. This professional input prevents costly colour mistakes while leaving the physical work to you.
Some painting companies offer tiered services allowing you to choose which aspects you want professionally handled. You might hire them for ceiling painting and cutting in around trim while handling wall rolling yourself. Discuss these options when obtaining quotes to find arrangements fitting your budget and capabilities.
"The decision between professional and DIY painting isn't about capability—it's about value. Calculate not just the money you save doing it yourself, but the time investment, stress level, and quality expectations. Sometimes paying professionals to handle projects you could do yourself makes perfect sense when it frees your limited time for priorities more important than painting."
Finding Design Inspiration and Additional Resources

Countless resources inspire and guide your children's bedroom painting projects. From social media platforms to professional design sites, gathering ideas from multiple sources helps you discover possibilities you might not have considered while developing your unique vision.
Online Inspiration Sources
Pinterest serves as an endless source of children's room design ideas. Create boards organizing images by colour scheme, age group, or style preference. Search specific terms like "blue boy nursery" or "tween girl bedroom ideas" to find targeted inspiration. Pin images that resonate with you and look for common threads revealing your aesthetic preferences.
Instagram showcases real rooms from families and professional designers worldwide. Follow hashtags like #kidsroomdecor, #nurserydesign, and #childrensbedroom to discover current trends and timeless ideas. Interior designers and paint companies maintain Instagram accounts sharing professional guidance and inspiring spaces.
Design blogs provide detailed room tours, how-to guides, and product recommendations. Websites focused on family living and home decoration regularly feature children's room designs with practical tips for achieving similar looks. Many designers share before-and-after transformations showing what's possible with paint and creativity.
Traditional Resources and Showrooms

Visit paint stores to see actual colour samples and receive expert advice. Staff members at stores like Benjamin Moore, Sherwin-Williams, and local paint shops provide valuable guidance based on extensive product knowledge. Many stores offer free colour consultation services helping customers select appropriate paints and finishes.
Take advantage of paint chip samples and small sample cans to test colours in your actual space. View samples under various lighting conditions at different times of day. Colours appear dramatically different in morning sunlight versus evening artificial light. This crucial step prevents expensive mistakes from choosing colours based on small chips viewed under store lighting.
Home improvement stores display vignettes showing different design styles and colour combinations. Walk through these displays for inspiration and to visualize how colours work together in three-dimensional space rather than flat on a screen. These physical examples help you understand scale and proportion difficult to grasp from online photos.
Interior design magazines like House Beautiful, Better Homes & Gardens, and Architectural Digest feature children's room designs in their family home sections. Tear sheets or bookmark pages showing rooms you love, then analyze what specifically appeals to you. Is it the colour palette, furniture arrangement, or decorative accents? Understanding what draws you to specific designs helps articulate your vision.
Learning Through Online Communities

Online forums and Facebook groups dedicated to home decoration and parenting provide community support and practical advice. Members share real-world experiences with paint brands, colour choices, and DIY techniques. These communities offer honest feedback when you're uncertain about colour choices or need troubleshooting help with painting problems.
YouTube tutorials teach painting techniques step-by-step through video demonstrations. Watch professionals and experienced DIYers explain everything from basic painting skills to advanced techniques like ombre effects or stenciling. Seeing processes demonstrated helps build confidence tackling projects yourself.
Our blog at Rossetti Art regularly features articles about decorating children's spaces, selecting art that complements painted walls, and creating cohesive room designs. Explore our resources for ongoing inspiration and practical guidance beyond this article.
Local home tours and show houses open to the public showcase professional design work including innovative uses of paint in children's spaces. These tours provide opportunities to see quality craftsmanship up close and speak with designers about their choices. Many communities organize annual home tours raising money for charity while inspiring attendees with beautiful spaces.
Creating Lasting Memories Through Thoughtful Design

Wall painting for children's bedroom projects represents more than just home improvement. These spaces shape childhood memories, support development, and provide safe havens where your children grow and dream. The time and thoughtfulness you invest in creating these environments demonstrates love in tangible, lasting ways.
From understanding colour psychology and selecting age-appropriate themes to mastering practical painting techniques and adding complementary decor, you now possess comprehensive knowledge to create exceptional children's rooms. Whether you choose bold accent walls or soft neutral tones, the key lies in balancing your child's preferences with practical considerations ensuring spaces that work beautifully for years.
Remember that perfect rooms don't come from following rigid rules but from understanding principles and adapting them to your unique situation. Your child's bedroom should reflect their personality, support their needs, and evolve as they grow. The flexible approaches outlined here allow you to create spaces that accomplish all these goals while staying within budget and maintenance capabilities.
As you embark on your painting project, embrace both the process and imperfections. The paint drip you'll discover years later or the handprint on the accent wall before furniture covered it become treasured reminders of this time. These spaces witness thousands of bedtime stories, homework sessions, and quiet moments that form the fabric of childhood.
Take pride in the environment you're creating for your child. Whether you paint every inch yourself or hire professionals to execute your vision, the care and intention you bring to the project matter most. Your child will feel the love invested in their space even if they can't articulate it, and those positive feelings contribute to their sense of security and belonging.
Beyond paint on walls, you're creating a foundation for confidence, creativity, and self-expression. When children have spaces designed with their needs in mind, they develop stronger senses of identity and ownership. The room becomes theirs in meaningful ways, teaching responsibility while providing freedom to be authentically themselves.
Start your project with confidence knowing you have the knowledge to make informed decisions every step of the way. Trust your instincts, involve your child appropriately, and remember that the goal is creating a space that works for your family, not achieving magazine perfection. The most beautiful children's rooms are those filled with love, laughter, and signs of actual living, not pristine showrooms no one dares disturb.
Frequently Asked Questions About Wall Painting for Children's Bedroom
What paint colors are best for helping children sleep better?
Cool colours like soft blue, lavender, and sage green promote calm and relaxation conducive to quality sleep. These shades lower heart rate and reduce anxiety, helping children wind down for bedtime more easily. Lighter shades work better than saturated versions which can still feel slightly stimulating. Avoid bright yellows, oranges, and reds in sleeping areas as these energizing colours interfere with rest.
Consider the overall room atmosphere when selecting sleep-promoting colours. Pair calming wall paint with appropriate lighting (warm bulbs, dimmers), comfortable textiles, and peaceful wall art featuring soothing nature themes. The complete environment matters more than paint colour alone in establishing healthy sleep routines.
How do I choose paint that's safe for my baby's nursery?
Select paints labelled zero-VOC or low-VOC to minimize chemical exposure in nurseries. Look for third-party certifications like Green Seal or GREENGUARD indicating the paint meets strict safety standards for indoor air quality. Brands like Benjamin Moore Natura, Sherwin-Williams Harmony, and ECOS Paints specifically formulate products safe for babies and young children.
Paint the nursery at least two to three weeks before your baby arrives, allowing time for complete drying and off-gassing. Maintain excellent ventilation during and after painting by opening windows and using fans. Even low-VOC paints release some emissions during application and initial drying. Natural paints made from clay, chalk, or plant-based ingredients offer the safest option, though they cost more than conventional products.
Can I paint over wallpaper in my child's room?
While technically possible to paint over wallpaper, it's generally not recommended because it can lead to problems like bubbling, peeling, and visible seams. Wallpaper removal before painting ensures better adhesion and smoother final results. If the wallpaper is firmly attached without loose areas or tears, you might succeed painting over it, but proper preparation is crucial.
If you must paint over wallpaper, first ensure all seams are glued down securely. Apply oil-based primer (not latex) to seal the wallpaper and prevent moisture from loosening the adhesive. Sand any textured areas smooth and fill obvious seams with joint compound. Even with careful preparation, results often disappoint compared to painting over properly prepared drywall. For children's rooms where durability matters, investing time to remove wallpaper properly proves worthwhile.
What's the most durable paint finish for kids' rooms?
Eggshell or satin finishes provide the best balance of durability and appearance for most children's bedrooms. These mid-sheen finishes withstand regular cleaning better than flat paint while hiding minor wall imperfections better than semi-gloss. They handle the wear and tear typical in kids' rooms without showing every fingerprint or mark.
For high-traffic areas like around light switches or near doors where children frequently touch walls, consider semi-gloss paint specifically in those zones. Semi-gloss stands up to repeated cleaning and resists stains best, though it shows wall flaws more prominently. Many families use eggshell on main walls with semi-gloss trim for a practical yet attractive combination that maintains well in active children's spaces.
How can I create an accent wall that my child won't outgrow quickly?
Choose accent wall colours based on sophisticated shades rather than character themes or very trendy colours. Deep teal, navy blue, sage green, or warm gray work across age ranges from toddler through teenage years. These classic colours provide personality without committing to interests that change rapidly as children grow.
Alternatively, paint accent walls in neutral colours and bring personality through changeable elements like canvas prints, decals, or removable wallpaper. This approach allows the room to evolve with your child's interests without repainting. When they move from dinosaurs to sports to abstract art, simply swap the wall decorations while keeping the foundational paint colours that work for any theme. This flexibility saves money while ensuring the room always feels current.
Should I use primer before painting my child's bedroom?
Yes, primer is essential for most painting projects and especially important in children's rooms where paint durability matters. Primer helps paint adhere properly, provides uniform surface for even colour coverage, and reduces the number of finish coats needed. When changing colours dramatically (especially from dark to light or vice versa), tinted primer makes the transition much easier.
Skip primer only when repainting with very similar colours over existing paint in good condition applied within the past couple of years. Even then, spot-prime any repaired areas to ensure even absorption. For new drywall, repairs, or when covering dark colours, primer isn't optional—it's essential for professional-quality results. The small additional cost of primer saves money overall by reducing finish coats needed and extending the paint job's lifespan.
What's the best way to test paint colors before committing to full walls?
Purchase sample-sized paint cans (typically eight ounces) and paint large squares directly on your walls. Paint sections at least two feet by two feet in different areas of the room to see how colour appears in various lighting conditions. View your samples during bright morning light, afternoon sun, and evening artificial lighting over several days before making final decisions.
For even better testing, paint samples on large poster boards you can move around the room. This method lets you hold colours near furniture, flooring, and existing decor to see how everything works together. It also prevents you from painting test patches directly on walls that require additional primer and paint to cover if you don't like the colour. Many families test three or four colours before finding the perfect shade, and sample testing prevents expensive mistakes.
How do I clean crayon marks off painted walls without damaging the paint?
For crayon marks on painted walls, try these methods progressing from gentlest to more aggressive as needed. Start with a paste of baking soda and water applied gently with a soft cloth. If that doesn't work, use a small amount of non-gel toothpaste rubbed in circular motions. Magic erasers (melamine foam) work effectively but use them sparingly as they're mildly abrasive and can dull paint finish with overuse.
For stubborn crayon, try WD-40 sprayed on a cloth (never directly on walls) and rubbed gently on the marks. The lubricant breaks down waxy crayon effectively. Always follow up by washing the area with mild soap and water to remove any residue. Test any cleaning method in an inconspicuous area first to ensure it doesn't damage your specific paint. Walls painted in eggshell or satin finishes clean more successfully than flat paint, which is why these finishes are recommended for children's rooms.
What wall painting ideas work well for shared children's bedrooms?
For rooms shared by siblings, choose neutral base colours that don't favour either child, then create individual zones through accent colours or decor. Paint one wall area in each child's preferred colour creating distinct spaces while maintaining overall cohesion. Alternatively, use one neutral colour throughout with different canvas art and accessories in each child's preferred style above their bed area.
Colour-blocking techniques work beautifully in shared rooms by dividing space visually while maintaining design harmony. Paint the room in complementary colours—like soft blue and sage green—that work together aesthetically while giving each child some ownership over their section. Include children in decisions about their individual areas while you maintain control over the overall palette ensuring the room feels unified rather than divided. Shared spaces require extra thoughtfulness about colour choices but offer opportunities for creative solutions that please everyone.
How long should I wait before moving furniture back after painting?
Wait at least 24 to 48 hours before moving furniture back against freshly painted walls, depending on humidity levels and paint type. While paint feels dry to touch within a few hours, it continues curing for several weeks. Moving furniture too soon risks transferring paint from walls onto furniture or damaging the still-vulnerable paint surface.
For children's rooms, err on the side of caution and wait the full 48 hours or longer if possible. During this time, keep the room well-ventilated with windows open and fans circulating air to speed drying and reduce any remaining paint odours. Even low-VOC paints benefit from extended ventilation before children return to sleeping in the room. When you do move furniture back, place protective padding between furniture and walls for the first few weeks while paint completes curing to prevent marks or damage from contact.

Leave a comment
This site is protected by hCaptcha and the hCaptcha Privacy Policy and Terms of Service apply.