What if the marks you fear are the ones that make a work unforgettable?
This friendly guide shows how the ancient aesthetic of imperfection can become a practical studio practice. Cold wax pairs beautifully with oil and mixed media to build texture, depth, and an intimate atmosphere.
Serena Barton’s clear methods and step-by-step demos inspire an exploratory process. You’ll learn simple mark-making, layering, and excavation techniques that create a true "history of surface."
Whether you are new to abstract work or seasoned, this page will help you trust materials, accept chance, and shape paintings that feel lived-in rather than overly polished.

Key Takeaways
- Find beauty in imperfection and time-worn surfaces to guide creative choices.
- Cold wax supports texture, atmosphere, and layered depth in a simple process.
- Serena Barton’s approach offers practical demos and mark-making ideas to follow.
- The goal is a lived-in surface that records decisions and chance.
- This guide will help both beginners and experienced artists develop an intuitive voice.
Why Wabi-Sabi Meets Cold Wax So Well, Today
An emphasis on restraint and texture helps artists translate impermanence into visible surface stories. This aesthetic values the imperfect and the transitory, so the result feels honest rather than contrived.
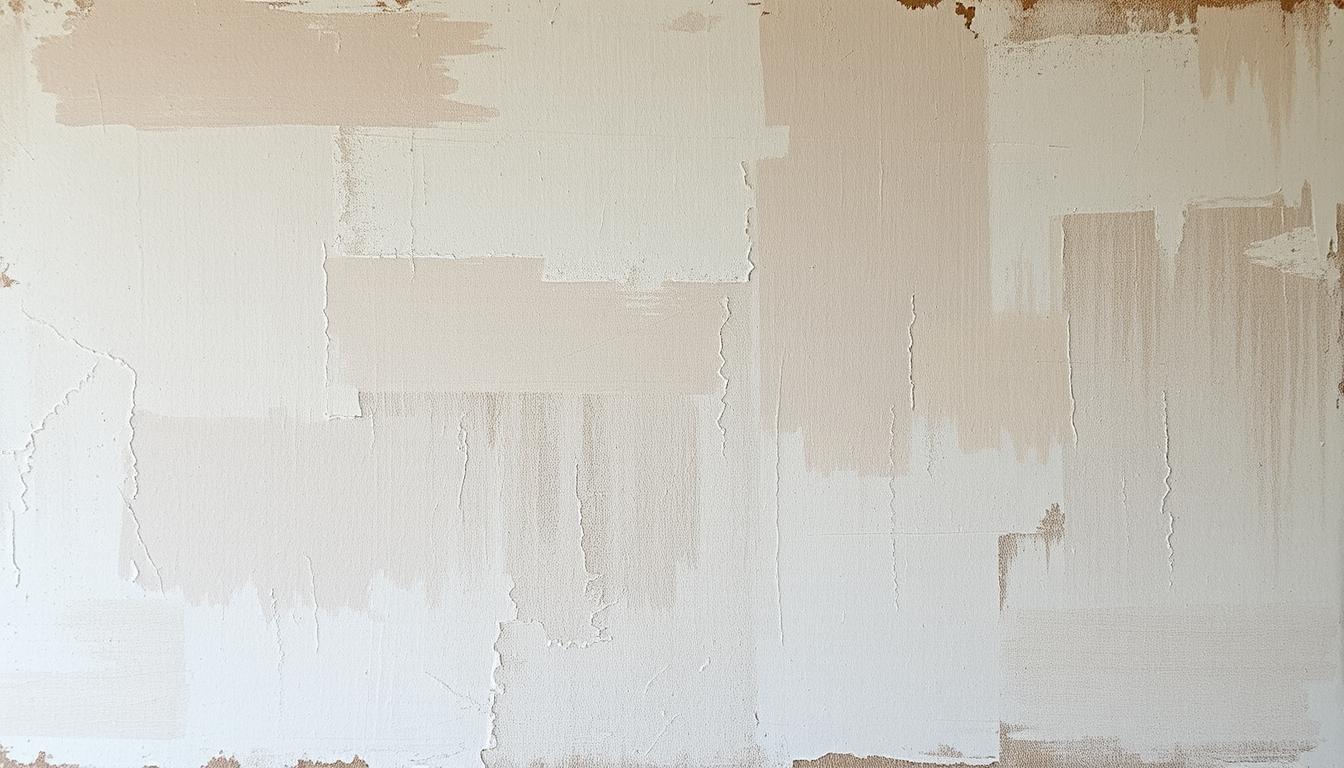
Cold wax combined with oil supports layered applications that hold each decision on the surface. The medium dries to a matte finish that softens glare and reveals subtle nuance. That quiet look lets elements recede or reappear over time.
The layered method encourages patience. Layers are added, scored, and scraped so the history of making is visible. These processes welcome risk and surprise, turning accidents into new options rather than failures.
This approach is accessible to a range of skill levels. It shifts the emphasis from perfection to steady noticing. Artists learn to use negative space and simple contrasts as deliberate choices.
| Feature | How it helps | Studio outcome |
|---|---|---|
| Matte finish | Reduces glare, increases quiet detail | Subtle mood and atmosphere |
| Layering | Records decisions over time | Visible “history of surface” |
| Excavation | Reveals earlier marks and textures | Honest, lived-in surfaces |
For practical demos and to see how these techniques play out in real studio practice, explore Serena Barton’s methods on this page. The result is a relevant, grounded way to make work that resists visual overload and rewards slow looking.
What You Need to Paint Cold Wax with Oil: Tools, Surfaces, and Mediums
A pared-down supply list keeps decisions clear and lets texture and chance lead the work. Start with a single soft body cold wax medium that mixes into oil paint to form a creamy, malleable paste. This paste holds tool marks, scores well, and dries to a velvety matte finish that highlights subtle layers.
Cold wax, additives, and mixing
Common additives include small amounts of solvent for flow, powdered marble for body, and dry pigments to shift opacity. Mix ratios matter: about 1 part medium to 2–3 parts oil paint gives a spreadable paste; increase medium for thinner veils and reduce it for chunky, tool-holding layers.
Supports and grounds
Choose rigid supports such as cradled wood panels or primed boards that resist bending during scraping. Use absorbent, toothy grounds—rabbit-skin or acrylic gesso layered thin—to encourage grip and reveal earlier layers when you sand or incise.
Tools and improvised finds
Build a starter kit: silicone scrapers, brayers, palette knives, squeegees, stiff brushes, shop rags, and gloves. Repurpose jar lids, mesh, cardboard, bottle caps, forks, and plastic wrap for organic texture. These simple tools make hundreds of useful marks.

Safety tip: Ventilate when using solvents, store oily rags in a sealed metal container, and label jars. A small palette of reliable colors and a few trusted tools are enough to begin; restraint often yields more expressive layers than a crowded studio.
Core Techniques for Wabi Sabi Painting with Cold Wax
Start by thinking of each layer as a quiet decision that can be revealed later. This section outlines simple studio methods that favor restraint, honest marks, and a lived-in surface. Follow each step slowly and let the material speak.
Layering and veiling
Alternate opaque and translucent passes to build calm depth. Use thin mixes of oil and medium for veils that unify busy areas and preserve negative space.
Keep a limited palette and soft value range. That restraint makes subtle color shifts more meaningful and keeps compositions cohesive.
Mark-making methods
Use incising, stamping, pressing, and dragging to create rhythms that read as found rather than engineered. Everyday objects—cardboard, combs, or bottle caps—make authentic textures.
Vary pressure and tool angle so marks sit at different depths. These simple techniques create honest evidence of the hand.
Excavation and scraping back
Scrape, sand, and lift layers to reveal earlier passages. This controlled subtraction exposes the history of the surface and invites chance to become part of the work.
Work in stages: add, wait, then remove selectively. That pacing prevents overworking and keeps gestures readable.
Creating atmosphere and texture
Balance chance and control by setting soft constraints—limited elements, a narrow palette—while allowing spontaneous tool marks to remain. Let asymmetry and quiet areas offset textured focal points.
- Pause between passes and evaluate direction, weight, and scale of marks.
- Favor soft edges, broken lines, and partial shapes for weathered, human edges.
- Refer to practical demos and artist features like this featured artist for additional inspiration.

Step Demonstrations: A Guided Process from First Layer to Final Touch
Begin by setting a calm studio rhythm: seal a rigid panel, mix small batches of oil paint and cold wax to a spreadable paste, and choose one focal direction for your first passes.
Surface prep, initial mixes, and intuitive first passes
Start broad. Use scrapers and brayers to lay down value, temperature, and movement. These early actions are about intention, not detail.
Developing elements: add, subtract, refine edges, and resolve composition
Build layers slowly, alternating opaque and translucent mixes so each coat reads as part of a history. Let drying intervals guide your rhythm and choices.
Introduce marks with incising, stamping, and gentle scraping. Repurposed tools—jar lids, mesh, or forks—help keep textures honest and unforced.
- Assess by squinting and rotating the panel; add or remove paint to clarify relationships between shapes and negative space.
- Use excavation selectively to reveal earlier colors and unify discordant areas; think of subtraction as a finishing move.
- Refine edges with soft blends and broken lines so contours feel human, not mechanical.
Final step: close when the surface breathes. Small irregularities often give the work its quiet life. Serena Barton’s 29 step demonstrations on the page offer plenty of variations to practice this process.
Inspiration, Practice, and Reviews: Learning from Serena Barton and Other Artists
Practical examples from peers make experimental processes feel accessible and repeatable.
Serena Barton’s 309-page Kindle edition (first published July 22, 2015) is a solid starting point. The book includes 29 step demonstrations and contributions from 12 other artists. Many reviews praise its clear, confidence-building structure and its focus on intuitive layering and excavation.
Read reviews and artist accounts to see varied approaches. Contributors show many ways to reach simplicity and depth. That variety proves there is no single way to work.
- Step demonstrations demystify complex surfaces and form repeatable studio habits.
- Community feedback—workshops, critique groups, or online forums—helps you learn when to stop and when to push.
- Short, frequent sessions grow skill and build an individual vocabulary of marks and moves.
| Resource | What it shows | How it helps |
|---|---|---|
| Serena Barton (book) | 29 demos, artist contributions | Practical guide to process and atmosphere |
| Artist reviews | Hands-on feedback and examples | Boosts confidence; suggests supplies and techniques |
| Community groups | Workshops and critiques | Offers targeted help and ongoing support |
Tip: keep a journal and photos of stages. Tracking decisions builds self-knowledge and a reliable way to reproduce effects. Retail listings and steady reviews show a lively network of artists exploring oil and mixed media, so you can find peers, supplies, and further instruction on the page.
Conclusion
Trust a slow, steady rhythm in the studio—small choices add up to meaningful surface stories. This guide gives you what you need know to start: basic materials, simple supports, and a calm process that favors meaning over polish.
Mix small batches of cold wax medium and oil paint, build layers thoughtfully, and pause often. Use humble tools and the step demonstrations to practice core techniques: layering and veiling, modest mark-making, and careful excavation to reveal texture and history.
Before you stop, check for balanced elements, coherent edges, a unified surface, and subtle texture that carries mood without shouting. Allow proper drying and protect the panel so the matte medium endures.
Keep painting cold in short sessions, iterate often, and trust that each pass brings you closer to quiet, enduring work.
Enhance Your Space with Unique Modern Masterpieces by Chiara Rossetti

Are you inspired by the innovative mediums and conceptual depth highlighted in our exploration of contemporary art? You’re not alone! Today’s art enthusiasts are seeking cultural relevance and emotional connections in their artwork. However, finding pieces that resonate with modern themes and fit your unique style can be a challenge. That’s where we come in!

At Rossetti Art, we specialize in canvas prints, original paintings, and modern sculptures that celebrate the spirit of now. Each piece created by Chiara Rossetti brings a personal touch that connects deeply with current social narratives—just like the modern masterpieces discussed in the article. Don’t miss out on the chance to elevate your home decor with breathtaking artwork that speaks to your values and aesthetic. Explore our collection today and find your perfect piece! Act now, and transform your space into a gallery of inspiration!
FAQ
What is the simplest way to start working with cold wax and oil to achieve an imperfect, aged look?
Begin with a small, sealed panel or primed canvas and mix a low ratio of cold wax medium into slow-drying oil paint (start around 1:1 paint to medium). Use a few thin, semi-transparent layers, letting each cool and dull slightly before adding the next. Keep tools simple — a palette knife, a cheap brayer, and a cloth — and focus on scoring, scraping, and soft veils rather than perfect coverage. This builds depth and an organic surface history with minimal fuss.
Which brands of cold wax medium and oil are reliable for layered work?
Look for reputable brands like Gamblin, Cold Wax Medium by R&F, or Williamsburg for consistent results. For oil paint, artist-grade wins for pigment strength; Gamblin, Old Holland, and Winsor & Newton are dependable. Test small mixes first, because each brand’s consistency affects drying, sheen, and how well layers adhere.
What surfaces hold up best to multiple layers, scraping, and abrasion?
Rigid boards such as birch panel, clayboard, or hardboard with a robust oil- or acrylic-based ground resist warping and allow aggressive scraping. Primed canvas can work but needs heavier support and a firm ground. Preparing a durable tooth and a sealed edge helps the surface accept repeated build-up and removal without delamination.
Can I use household tools when I don’t have specialty implements?
Yes. Palette knives, old credit cards, metal spatulas, kitchen scrapers, toothbrushes, and stiff brushes all make interesting marks. Brayers from printmaking add texture and thin layers. Recycled objects often create the most authentic, accidental marks that suit an imperfect aesthetic.
How do I layer without losing vibrancy or creating muddy colors?
Maintain transparency by using thin, toned glazes and avoid overmixing multiple strong pigments. Work from cool to warm or vice versa depending on the effect, and let each layer partially matt before applying the next. Scraping back to daylight can reintroduce brightness while preserving depth.
What are safe additives to modify drying and texture?
Additives like damar varnish sparingly or a small fraction of alkyd medium can speed cure times. Avoid solvent-heavy mixes if you want the tactile, matte finish of cold wax. Brand-specific cold-wax additives and stabilizers are better than random solvents; always follow manufacturer guidance and ventilate well.
How much cold wax is too much when mixing with oil paints?
Too much medium risks a soft, flexible film that may not cure properly and can remain tacky for long periods. A typical workable range is roughly equal parts paint and cold wax up to about twice the paint by volume, depending on brand and pigment. Test samples and let them cure to ensure long-term stability.
What techniques help create natural, timeworn textures and atmosphere?
Combine veils of thinned pigment with intentional abrasion and partial removals. Incising and stamping before layers fully set yields crisp impressions. Alternating opaque marks with translucent washes and strategically exposing earlier layers produces breathable depth and a sense of history.
How do I safely remove or scrape back layers without damaging the ground?
Use flexible metal or plastic scrapers, palette knives held shallow, or sanding after full cure. Work gently and test in an inconspicuous area. For stubborn spots, soften the layer with a small amount of solvent on a rag if the media allows, but avoid over-saturation that can harm the ground.
How long does a typical layered piece take to cure fully?
Cure time varies with pigment, layer thickness, and medium ratio. Thin, wax-rich layers can feel dry in days but may take weeks to months to harden. Heavier oil-rich passages can take many months to years. Plan your process with patience and use stable supports to avoid structural issues over time.
Can contemporary artists like Serena Barton’s approach inform beginners?
Yes. Study how established makers balance restraint, mark-making, and surface history. Observe their comfort with imperfection, controlled accidents, and layered restraint. Try small studies inspired by their methods before scaling up to larger, more resolved works.
What finishes or varnishes work over cold-wax–oil surfaces?
Many cold-wax surfaces have a matte, velvet finish that needs no varnish. If you want protection, use a conservation-grade wax varnish or a compatible retouching varnish tested on samples. Avoid aggressive solvent varnishes that can disturb wax layers; always patch-test first.
How can I develop a personal process that embraces imperfection?
Practice short, focused pieces that encourage risk-taking. Limit tools and colors, work quickly, and allow yourself to subtract as much as you add. Journaling marks, photographing stages, and sharing in local critique groups speeds learning and builds confidence.
Are there common pitfalls to avoid when learning these techniques?
Overworking, heavy impasto without proper support, and using incompatible materials top the list. Skip forcing perfect edges early; instead, build layers with intention. Test materials, keep records of mixes, and allow adequate drying between major moves to prevent problems later.

Leave a comment
This site is protected by hCaptcha and the hCaptcha Privacy Policy and Terms of Service apply.