A bare wall stares back at you like an unfinished sentence. You know something belongs there, but the thought of hammering holes without a plan makes you hesitate. Gallery walls solve this beautifully because they turn that intimidating blank space into a curated collection that tells your story one frame at a time.
Creating a gallery wall isn't about following rigid rules. It's about arranging art and photos in a way that feels intentional yet personal to your home.

What Is a Gallery Wall and Why It Works
A gallery wall brings together multiple pieces of art, photos, or prints on a single wall to create visual interest and personality. Unlike a single statement piece, a gallery wall lets you combine different styles, sizes, and elements into one cohesive display.
The beauty of gallery walls lies in their flexibility. You can start small with three pieces and expand over time. You can mix family photos with abstract canvas prints or keep everything uniform with matching frames.
Gallery walls work because they create depth and dimension that flat walls lack. Your eye travels across the collection rather than landing on one point. This movement makes rooms feel more dynamic and lived-in.

The Psychology Behind Gallery Wall Appeal
Our brains respond positively to organized collections. A well-planned gallery wall triggers the same satisfaction you feel when books line a shelf perfectly. The arrangement creates visual rhythm that feels calming yet stimulating.
Gallery walls also serve as conversation starters. Guests naturally gravitate toward walls filled with art and ask questions about specific pieces. This social element makes your space feel more welcoming and personal.
Common Gallery Wall Misconceptions
Many people think gallery walls require expensive art or professional installation. The truth is simpler. Gallery walls work with any budget because the collection itself matters more than individual piece value.
Another myth suggests you need all frames to match. Mixing frame styles actually adds character and prevents the wall from looking too staged. The key lies in finding a common thread like color palette or subject matter.

Planning Your Gallery Wall Layout
The layout determines whether your gallery wall looks intentional or haphazard. Before touching a hammer, plan your arrangement on the floor or use painter's tape on the wall to visualize the final look.
Grid Layout: Clean and Structured
Grid layouts arrange frames in perfect rows and columns. This style works best when all pieces share the same size and frame style. The uniformity creates a clean, modern aesthetic that suits contemporary spaces.
To execute a grid layout, measure the total wall space and divide it evenly. Leave consistent spacing between each piece, typically two to three inches. This mathematical approach eliminates guesswork and ensures balance.

Salon Style: Organic and Eclectic
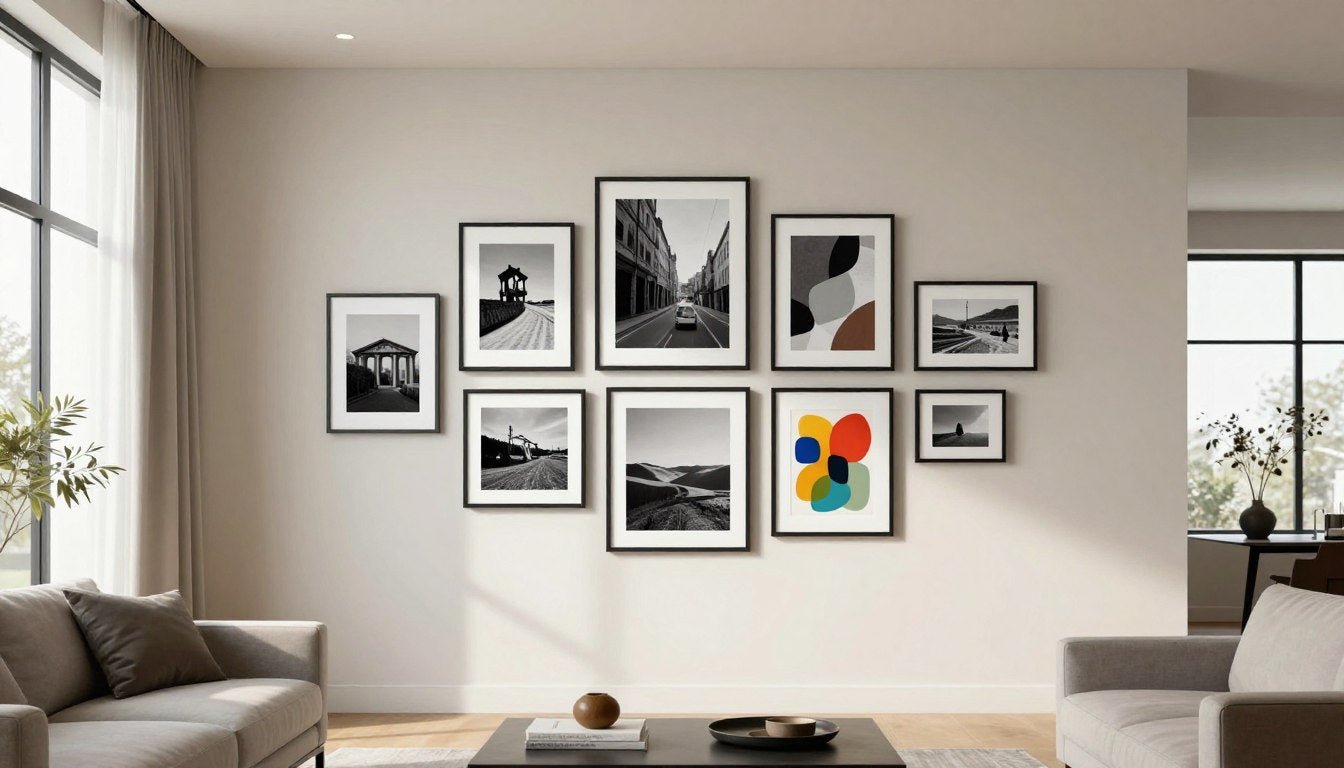
Salon-style gallery walls embrace asymmetry by mixing different frame sizes and orientations. This approach mimics traditional art salons where walls displayed collections floor to ceiling. The result feels collected over time rather than purchased in one trip.
Start with your largest piece as an anchor point. Build outward by placing medium pieces next, then fill gaps with smaller items. Maintain relatively consistent spacing between frames to keep the organic look from becoming chaotic.
This style pairs beautifully with varied art types. Combine botanical wall art prints with vintage photos and abstract pieces for a curated aesthetic that showcases your personal style.

Horizontal and Vertical Lines
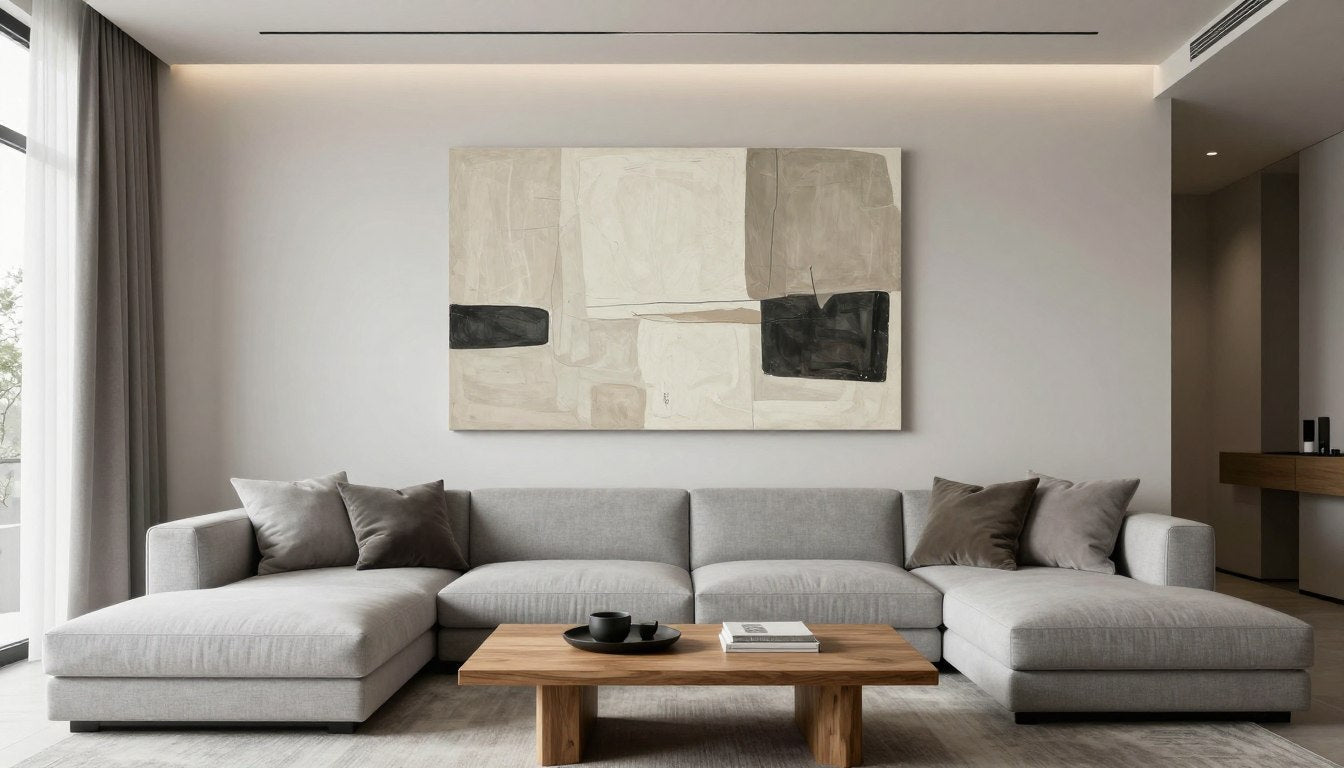
Linear arrangements follow a single horizontal or vertical line. Horizontal gallery walls work perfectly above sofas or beds because they emphasize width and make rooms feel larger. Vertical arrangements draw the eye upward and make ceilings appear higher.
For horizontal layouts, align the bottom or center line of all frames. This creates visual stability even when frame sizes vary. Space pieces evenly along your imaginary line for best results.

Themed Clusters
Cluster layouts group related pieces together into distinct sections. You might create a family photo cluster on one side and an art collection cluster on the other. This approach works well when you have multiple interests or themes to display.
Leave breathing room between clusters so each grouping reads as its own element. Within each cluster, apply salon-style principles for an organic feel that still maintains overall structure.
Choosing the Right Art for Your Gallery Wall
📐 Not sure what size to choose? Use our free Wall Art Size Calculator → https://rossettiart.com/blogs/news/wall-art-size-calculator
The art you choose makes or breaks your gallery wall. You need pieces that work individually but also harmonize as a collection. This balance requires thinking about color, subject matter, and visual weight.
Color Palette Cohesion
Select a color palette before choosing individual pieces. Your palette might be monochromatic for a calming effect or vibrant for energy. Either way, repeating certain colors throughout the collection creates visual unity.
A black and white gallery wall offers timeless elegance. Mix black and white canvas prints with photography for contrast and depth. This approach works in any room style from modern to traditional.

For color lovers, pick three main colors that appear throughout your collection. These colors can show up in different intensities and combinations while maintaining cohesion. Add neutral pieces to give the eye places to rest.
Mixing Art Styles Successfully
Combining different art styles adds interest but requires intention. Abstract pieces pair beautifully with photography because they offer contrasting approaches to visual storytelling. The key is finding a common element like color or mood.
Gallery-quality canvas prints elevate any collection. Hand-stretched canvas with archival inks ensures your pieces maintain their vibrancy for years. UV-resistant treatments protect against fading from sunlight exposure.

Size and Scale Considerations
Vary your piece sizes to create visual rhythm. A gallery wall with all same-size frames feels flat and predictable. Mix large statement pieces with medium supporting pieces and small accent items.
Your largest piece should typically be no more than two-thirds the size of your smallest piece. This ratio prevents any single item from dominating while maintaining clear hierarchy. Distribute visual weight evenly across the entire wall space.
Subject Matter and Theme
Decide whether you want a themed gallery wall or an eclectic mix. Themed walls might feature all family photos, all nature subjects, or all abstract art. These create strong visual statements and work well in specific rooms.
Eclectic galleries combine different subjects united by style or color. You might mix animal canvas prints with geometric abstracts if they share a color palette. This approach showcases broader interests and adds personality.

Styling Tips to Make Your Gallery Wall Shine
The difference between a good gallery wall and a great one often comes down to thoughtful styling choices. Small details like frame selection, matting, and lighting transform collections from pleasant to stunning.
Frame Selection Strategies
Your frames unify disparate pieces into a cohesive collection. You have two main approaches: matching frames for consistency or mixed frames for character. Both work when executed with intention.
Matching frames create instant harmony. Choose frames in the same color and style, then let your art provide the variety. This approach works especially well for photo gallery walls where you want faces and memories to take center stage.

Mixed frames require finding a common thread. You might vary frame colors but keep the same profile width. Or use different styles all in warm wood tones. The thread creates cohesion while variety adds visual interest.
The Magic of Matting
White matting around prints creates breathing room and adds a polished, gallery-quality feel. Mats separate the art from the frame and make smaller pieces appear more substantial. They also protect art from touching the glass.
Standard mat width ranges from two to four inches. Wider mats suit larger pieces while narrower mats work for smaller items. Keep mat width consistent across your collection for professional results.
Lighting Your Gallery Wall
Proper lighting transforms a gallery wall from flat to dimensional. Natural light works wonderfully but avoid direct sunlight that causes fading. UV-resistant prints offer protection, but indirect light still provides the best long-term preservation.
Picture lights or track lighting add drama and focus. Position lights to illuminate art without creating glare on glass. Warm light temperatures create cozy atmospheres while cool light suits modern spaces.

Adding Dimension and Depth
Break up the flat surface by incorporating dimensional elements. Small shelves can hold framed pieces that lean rather than hang. Three-dimensional objects like mirrors or wall sculptures add texture variation.
Layer frames at different depths by using various frame thicknesses. Oak floater frames create depth by suspending art away from the wall. This layering effect catches light differently and adds sophisticated dimension.
The Negative Space Balance
Don't fill every inch of wall space. Negative space around and between pieces gives the eye places to rest. This breathing room prevents your gallery wall from feeling cluttered or overwhelming.
Aim for consistent spacing between pieces, typically two to three inches. On larger walls, you can increase this to four inches. The space should feel intentional, not accidental.

Room-Specific Gallery Wall Ideas
Different rooms call for different gallery wall approaches. The art you choose and how you arrange it should complement each space's function and mood. Consider who uses the room and what atmosphere you want to create.
Living Room Gallery Walls
Living rooms accommodate your largest and most impressive gallery walls. These spaces offer substantial wall real estate and serve as entertaining areas where guests naturally gather. Make a statement with salon-style arrangements that showcase your design sensibility.
Position your gallery wall above the sofa or opposite the seating area where it becomes a focal point. Keep the bottom edge of your lowest frame about eight to ten inches above furniture. This creates visual connection without making pieces feel perched.

Living room walls work beautifully with abstract geometric canvas prints that add modern sophistication. Mix these with family photos and meaningful pieces that reflect your personality and interests.
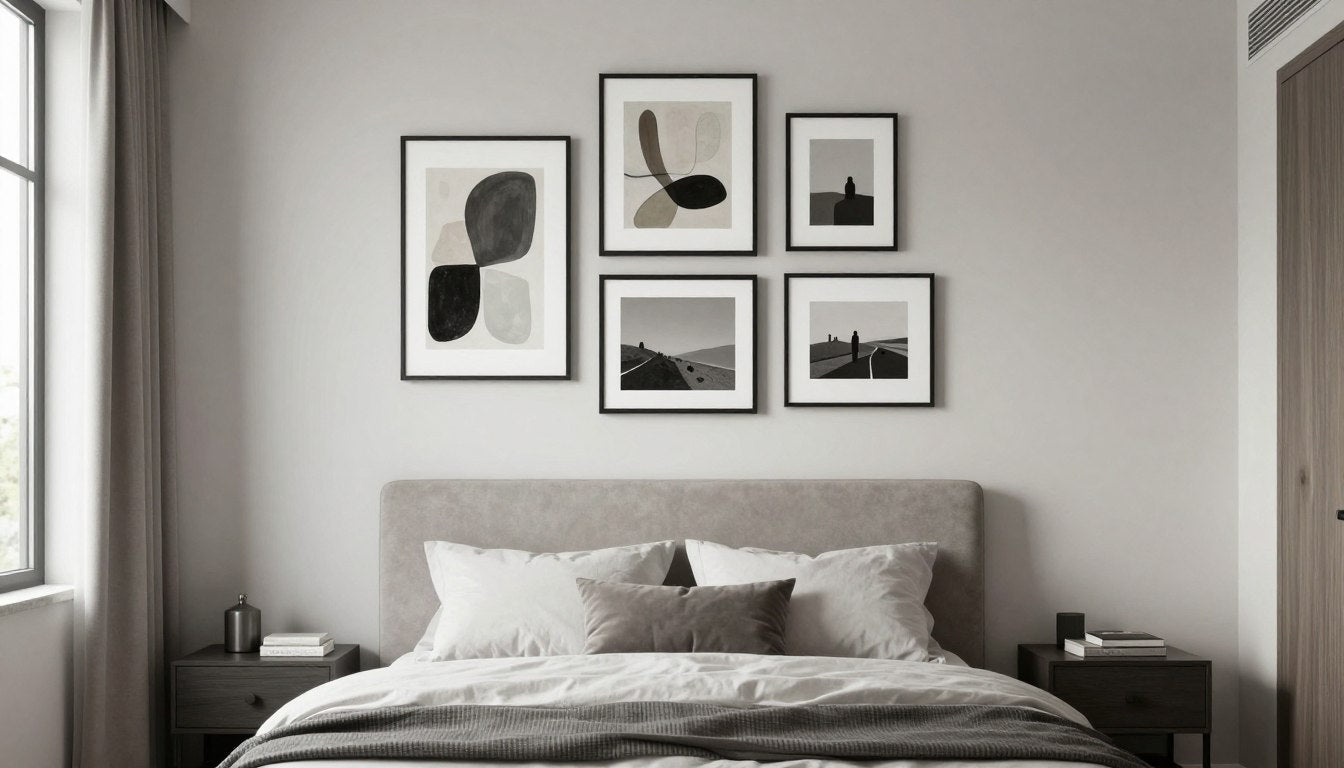
Bedroom Gallery Walls
Bedrooms call for calming gallery walls that promote relaxation. Choose soothing subjects like nature scenes, gentle abstracts, or black and white photography. Avoid overly stimulating colors or busy patterns that might interfere with sleep.
The wall above your bed provides the perfect gallery wall location. Create a horizontal arrangement that emphasizes the width of your headboard. Keep pieces proportional to bed size so the wall doesn't feel top-heavy.

Dining Room Collections
Dining rooms offer opportunities for themed gallery walls that enhance meal experiences. Food photography, wine country landscapes, or vintage advertising posters create atmosphere. These spaces also work well for formal portrait collections.
Position your gallery wall where diners can admire it during meals. The wall opposite the table head provides the best viewing angle. Keep the collection height between forty and sixty inches from the floor for comfortable viewing while seated.
Hallway and Stairway Galleries
Hallways and stairways make perfect gallery spaces because you naturally view them while moving. This creates opportunities for narrative arrangements that tell stories as you walk past. Family chronologies or travel photo collections work beautifully here.
For stairways, follow the angle of the stairs with your bottom frame edges. This diagonal line feels intentional and guides the eye upward. Maintain consistent spacing between pieces despite the slanted arrangement.

Home Office Inspiration Walls
Home offices benefit from gallery walls that inspire creativity and focus. Motivational quotes, cityscape canvas prints, or subject-specific art related to your work create engaging environments that boost productivity.
Position your gallery wall in your line of sight when you look up from work. This placement provides visual breaks during long tasks. Choose colors that energize without overwhelming, like deep blues or warm earth tones.

Kids Room Gallery Walls
Create playful collections with kids and nursery canvas prints that grow with your child. Mix educational elements with whimsical art and personal photos. Position pieces at child's eye level for lower sections.

Entryway Impact Walls
Make powerful first impressions with bold entryway gallery walls. This space welcomes guests and sets your home's tone. Choose pieces that represent your style confidently. Mix pop art canvas prints with personal favorites for personality.

Bathroom Art Walls
Bathrooms need special consideration due to moisture. Choose canvas prints with protective coatings or properly sealed frames. Keep collections small and focused. Spa-inspired themes with botanical or ocean subjects create relaxing atmospheres.
Hanging and Installation Guide
Even the most beautiful gallery wall falls flat with poor installation. Proper hanging ensures your pieces stay secure and look professionally displayed. Follow these steps to avoid common mistakes and achieve gallery-quality results.
Essential Tools and Materials
Gather your supplies before starting. You'll need a hammer, nails or picture hooks rated for your frame weights, a level, measuring tape, pencil, and painter's tape. Laser levels make the job easier but aren't essential.
For wall types other than drywall, adjust your hardware. Plaster walls need anchors for heavier pieces. Brick or concrete requires masonry bits and specialized hangers. Always check weight ratings on hanging hardware.

The Paper Template Method
Create paper templates matching each frame's exact size. Arrange these templates on the floor in your desired layout. Once satisfied, photograph the arrangement for reference. Then tape templates to the wall in the same configuration.
Mark nail placement through the paper before hanging frames. This method lets you perfect placement without putting unnecessary holes in walls. Remove templates after marking nail points and hang frames confidently.
Finding the Right Height
Eye level placement creates the most comfortable viewing experience. For standard gallery walls, position the center point of your collection at fifty-seven to sixty inches from the floor. This height works for most people's natural sight lines.
When hanging over furniture, measure from the furniture top rather than the floor. Keep eight to ten inches between furniture and the lowest frame. This connects the gallery wall to the piece below without crowding.

Spacing and Alignment
Maintain consistent spacing between all frames. Two to three inches works for most collections, though you can go up to four inches on very large walls. Measure spacing carefully before committing to nail placement.
Use your level religiously. Even frames that look straight to the naked eye often tilt slightly. Check both horizontal and vertical alignment. Frames should line up perfectly along your imaginary grid lines.
Hanging Different Frame Types
D-rings and wire hangers require different approaches. For D-rings, hang from two hooks for stability. Wire hangers need one centered hook. Consider frame weight when choosing between nails and heavy-duty hooks.
Made-to-order canvas prints often come ready to hang with integrated hardware. Gallery-wrapped canvases can hang directly from a single nail if they have sawtooth hangers. Always verify hardware security before hanging.
The No-Damage Alternative
Command strips and adhesive hangers work for renters or commitment-phobes. These removable options hold surprising weight when used correctly. Follow package directions precisely and allow full cure time before hanging frames.
Picture rails offer another no-damage solution. Install one rail along your wall's top edge and suspend frames from adjustable cords or chains. This system allows easy rearrangement without new wall holes.

Adjusting After Installation
Step back frequently during installation to assess the overall look. What seems perfect up close might need adjustment from viewing distance. Take photos from across the room to spot alignment issues your eye might miss.
Don't hesitate to move pieces if something feels off. Extra nail holes hide easily with spackling compound. The time spent perfecting placement pays off every time you admire your finished gallery wall.
Frequently Asked Questions
Q: How do I start a gallery wall?
A: Start by choosing your wall location and measuring the available space. Gather potential pieces and arrange them on the floor to test different layouts. Create a cohesive look by selecting a unifying element like color palette, frame style, or theme. Use paper templates on the wall to visualize placement before making nail holes. Begin installation with your largest or central piece as an anchor point, then work outward.
Q: How many pictures should be in a gallery wall?
A: Gallery walls can include anywhere from three to fifty or more pieces depending on wall size and desired impact. Smaller walls work well with three to nine pieces in simple arrangements. Larger walls accommodate fifteen to thirty pieces in more complex salon-style layouts. Odd numbers often create more visually pleasing arrangements than even numbers. The key is proper spacing and balance rather than hitting a specific count.
Q: What is the rule for gallery walls?
A: The most important rule for gallery walls is maintaining consistent spacing between frames, typically two to three inches. Position the center point of your collection at eye level, about fifty-seven to sixty inches from the floor. When hanging above furniture, keep eight to ten inches between the furniture top and lowest frame. Choose a unifying element like color, frame style, or subject matter to create cohesion. These guidelines create professional-looking results while allowing creative freedom.
Q: Should all frames match in a gallery wall?
A: Frames don't need to match perfectly, but they should share a common thread for cohesion. You can mix frame styles successfully by keeping the same color family, maintaining similar frame widths, or using complementary finishes like all warm woods. Matching frames create a clean, uniform look ideal for showcasing varied art or photos. Mixed frames add visual interest and work beautifully in eclectic or collected-over-time aesthetics. Either approach succeeds when executed with intention.
Q: How do I choose art for a gallery wall?
A: Select art that shares at least one unifying characteristic like color palette, subject matter, or style. Start with pieces you genuinely love rather than buying solely to fill space. Mix different sizes for visual interest while maintaining balance. Consider the room's purpose and existing decor when choosing subjects and colors. Gallery-quality prints with archival inks and UV-resistant properties ensure your collection maintains its beauty over time. Test arrangements before committing to make sure pieces complement rather than compete with each other.
Q: Can I create a gallery wall with different size frames?
A: Different size frames create the most visually interesting gallery walls by adding rhythm and preventing monotony. Mix large statement pieces with medium supporting items and small accent elements. Your largest frame should typically be no more than twice the size of your smallest to maintain proper scale. Distribute visual weight evenly across the wall by balancing large pieces with groupings of smaller ones. This size variation works especially well in salon-style arrangements where asymmetry adds character.
Creating Your Perfect Gallery Wall
Gallery walls transform empty walls into personal art collections that reflect your unique style and story. The process combines creative vision with practical planning to achieve results that feel both intentional and authentically yours.
Start with pieces that speak to you rather than chasing trends. Your gallery wall should make you happy every time you walk past it. Whether you choose a structured grid or an organic salon arrangement, the collection becomes a living element of your home that you can evolve over time.

The technical aspects of spacing, hanging, and alignment ensure your creative vision translates into polished execution. Take your time with installation because proper placement makes the difference between amateur and professional results. Use the paper template method to experiment risk-free before committing to nail holes.
Remember that gallery walls aren't static. You can swap pieces seasonally, add new finds, or rearrange as your tastes evolve. This flexibility makes them more engaging than single statement pieces that feel permanent once hung.
Explore our Canvas Print Sets to discover curated collections designed to work beautifully together. Each piece features hand-stretched canvas, archival inks, and UV-resistant protection to ensure your gallery wall maintains its vibrant beauty for years to come.

Leave a comment
This site is protected by hCaptcha and the hCaptcha Privacy Policy and Terms of Service apply.