
Choosing the right size artwork transforms a room from ordinary to extraordinary. The wrong size piece creates visual imbalance that even the most beautiful art cannot overcome. Whether you are decorating a cozy bedroom or an expansive living space, understanding proper art sizing prevents costly mistakes and ensures your walls showcase artwork at its best potential.
This comprehensive guide teaches you professional measurement techniques used by interior designers. You will learn how to use a wall art size calculator approach, master the proven 2/3 rule, and understand when horizontal orientation works best for your space. These practical tips help you select artwork that complements your room proportions perfectly.
In This Guide
- Understanding Wall Art Proportions and the 2/3 Rule
- Measuring Your Wall Space Accurately
- Wall Art Size Calculator — Mathematical Approaches
- Horizontal Orientation Artwork: When Width Matters Most
- Room-Specific Art Sizing Guidelines
- Common Art Sizing Mistakes and How to Avoid Them
- Advanced Sizing Techniques for Complex Spaces
- Frame and Matting Impact on Final Artwork Size
- Digital Tools and Visualization
- The Relationship Between Budget and Artwork Size
- Style, Theme, and Seasonal Factors
- Frequently Asked Questions
Understanding Wall Art Proportions and the 2/3 Rule
Professional designers rely on the 2/3 rule as their primary guideline for artwork sizing. This principle states that your artwork should cover approximately two-thirds of the furniture width beneath it. The rule creates visual harmony between furniture pieces and wall decor, establishing proper scale relationships throughout the room.
How the 2/3 Rule Works in Practice
The 2/3 rule provides a mathematical framework for art selection. Measure the width of your sofa, bed, console table, or other furniture piece. Multiply that width by 0.67 to find your ideal artwork width. For example, if your sofa measures 90 inches wide, your wall art should be approximately 60 inches wide.
This calculation can involve a single large piece or a gallery wall arrangement. The total width of your art display should meet the 2/3 guideline. A three-piece horizontal arrangement might include three 20-inch-wide canvases spaced evenly to achieve the 60-inch total width requirement.

When to Adjust the Standard Proportion
The 2/3 rule serves as your starting point, not an absolute requirement. Rooms with high ceilings benefit from slightly larger artwork that draws the eye upward. Space with low ceilings works better with art that stays closer to the 50-60 percent range to avoid overwhelming the room height.
Consider your furniture style when applying this guideline. Modern minimalist furniture often pairs well with larger art pieces that make bold statements. Traditional furniture with ornate details may work better with slightly smaller artwork that allows the furniture design to shine without visual competition.
Calculating Multiple Piece Arrangements
Gallery wall layouts require special attention to the 2/3 rule. Measure the entire width your gallery wall will occupy, including the space between frames. This total width should equal approximately two-thirds of your furniture width. A wall display measuring 60 inches might include five 10-inch frames with 2-inch spacing, or three larger pieces with proportional gaps.
The space between pieces matters as much as frame sizes. Interior designers recommend leaving 2-3 inches between frames in gallery arrangements. This spacing prevents the display from appearing cluttered while maintaining visual unity. Whether you are exploring options in our canvas prints collection or considering original works, these spacing principles apply universally.
Measuring Your Wall Space Accurately for Art Selection
Accurate wall measurements form the foundation of successful art placement. Professional designers use specific techniques to capture not just dimensions, but also the functional space available for artwork. This section teaches you how to measure wall space like an interior design expert.
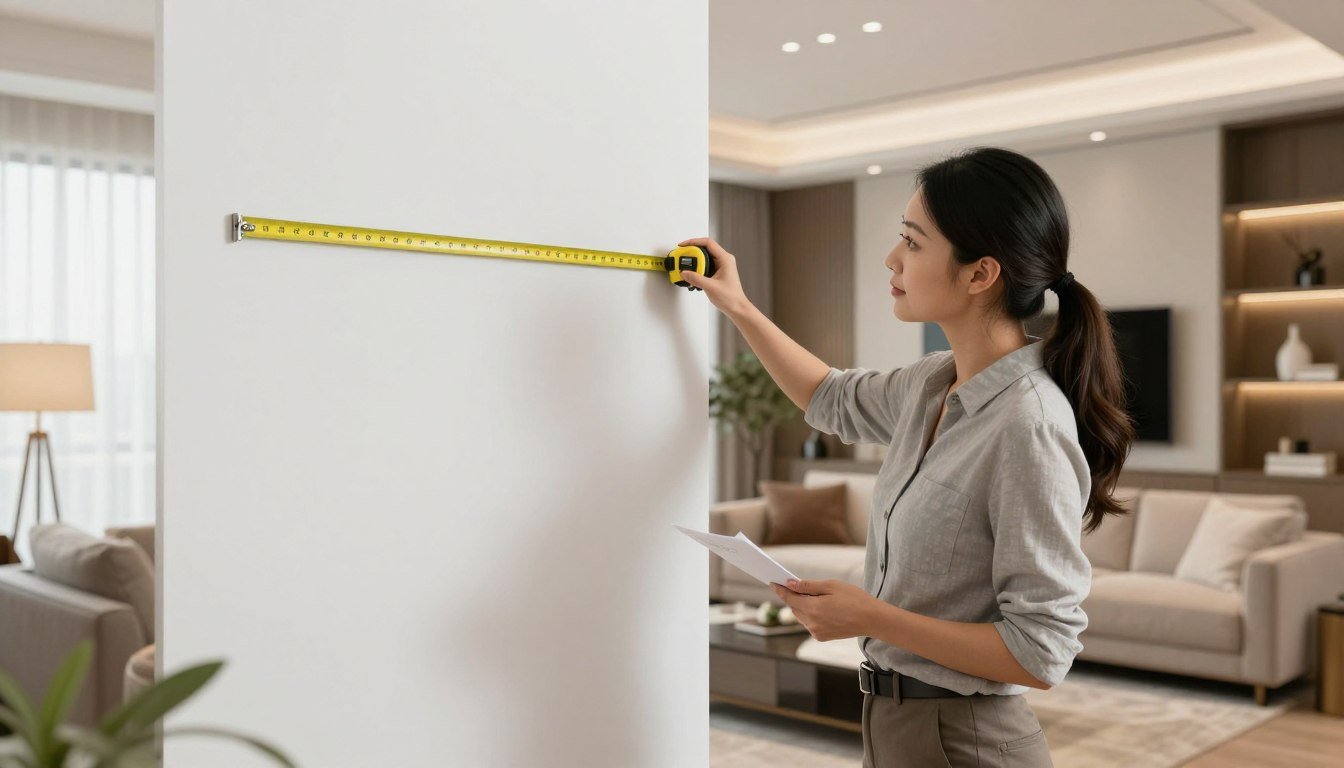
Essential Tools and Measurement Techniques
Gather a metal tape measure, pencil, and paper before starting your measurements. Metal tape measures provide more accuracy than cloth versions, especially for spans exceeding 72 inches. Stand at the center point of your wall to measure width and height in inches, the standard unit for artwork sizing in the United States.
Record the total wall dimensions first, then identify any obstacles. Note the location of windows, doors, wall sconces, and electrical outlets. These fixtures create boundaries that affect your available art space. A wall measuring 120 inches wide with a centered window reduces your effective space considerably.

Calculating Usable Wall Space
Usable wall space differs from total wall dimensions. Subtract fixture widths from your total wall width to find available space. Let us say your wall measures 144 inches wide with a 48-inch window centered on the wall. This leaves two sections of approximately 48 inches each on either side of the window.
Height calculations require consideration of furniture and sight lines. Measure from the top of your furniture piece upward, not from the floor. If your sofa back rises 32 inches from the floor and your ceiling height reaches 96 inches, you have 64 inches of vertical space to work with for art placement.
Creating a Wall Space Diagram
Sketch a simple diagram of your wall with measurements labeled clearly. Include furniture placement, ceiling height, and any architectural features. This visual reference helps when shopping for artwork, allowing you to quickly assess whether pieces fit your available space without returning to measure repeatedly.
Digital tools can enhance your planning process. Take a photograph of your wall and use photo editing apps to overlay measurement annotations. Some designers use painter's tape to outline potential art placement directly on the wall, providing a full-scale preview of how different sizes will appear in the space.
Accounting for Viewing Distance
Viewing distance affects perceived artwork size. Measure the distance from your primary seating area to the wall where art will hang. For viewing distances under 6 feet, artwork between 24-40 inches works well. Distances exceeding 10 feet require larger pieces, typically 48 inches or more, to maintain visual impact across the room.
This principle explains why entryways and hallways often feature smaller pieces while living rooms demand larger artwork. The space between the viewer and wall determines how artwork registers visually. A 30-inch piece appears substantial when viewed from a reading chair five feet away but seems diminished when viewed across a 15-foot great room.
Wall Art Size Calculator: Mathematical Approaches to Perfect Sizing
A wall art size calculator simplifies the process of determining ideal artwork dimensions. These calculation methods remove guesswork and provide specific measurements based on proven design principles. Understanding these mathematical approaches empowers you to make confident sizing decisions regardless of room layout or furniture configuration.
Free Tool
Wall Art Size Calculator
Enter your furniture details to get an instant professional size recommendation.
The Percentage Calculation Method
The percentage method provides precise artwork width based on furniture dimensions. Measure your furniture width in inches, then multiply by your chosen percentage. The standard 67 percent guideline (the 2/3 rule) serves most situations well, but you can adjust between 60-75 percent based on ceiling height and personal preference.
For example, a dining room buffet measuring 72 inches wide calls for artwork approximately 48 inches wide (72 × 0.67 = 48.24). A more dramatic statement could push to 75 percent, yielding a 54-inch piece (72 × 0.75 = 54). Conservative spaces might reduce to 60 percent, resulting in a 43-inch artwork (72 × 0.60 = 43.2).

Height-to-Width Ratio Calculations
Artwork height should harmonize with width to create balanced proportions. A common ratio for horizontal pieces follows a 2:3 height-to-width relationship. An artwork 60 inches wide would measure 40 inches high (60 ÷ 1.5 = 40), creating pleasing horizontal emphasis suitable for spaces above sofas and beds.
Square formats follow a 1:1 ratio, offering modern simplicity. Vertical orientations often use 3:2 ratios, where height exceeds width. A vertical piece 30 inches wide might stand 45 inches high (30 × 1.5 = 45), ideal for narrow wall spaces flanking windows or in hallways.
Wall Coverage Percentage Formula
Calculate what percentage of your wall the artwork will occupy. Multiply artwork width by height to get square inches, then divide by your wall's total square inches (wall width × wall height). Aim for artwork that covers 30-40 percent of the wall space for balanced visual weight.
Consider a wall measuring 120 inches wide by 96 inches tall, totaling 11,520 square inches. Artwork measuring 60 inches wide by 40 inches tall covers 2,400 square inches. Divide 2,400 by 11,520 to get 0.208, or approximately 21 percent wall coverage. This suggests you could size up to achieve better visual impact in the space.
Ready to Find Your Perfect Piece?
Now that you understand professional sizing calculations, explore artwork that matches your measurements. Our curated collection features pieces in various dimensions to suit any space, from intimate rooms to expansive walls.
Multiple Piece Gallery Calculations
Gallery wall arrangements require aggregate width calculations. Add the width of each frame plus the space between frames to determine total display width. For three 20-inch frames with 3-inch gaps, calculate: 20 + 3 + 20 + 3 + 20 = 66 inches total width.
Compare this total to your furniture width using the percentage method. A 66-inch gallery wall suits furniture between 88-110 inches wide (66 ÷ 0.67 = 98.5 inches at the middle range). This calculation ensures your multi-piece arrangement maintains proper proportion even when individual frames vary in size.
Ceiling Height Adjustment Factor
Standard 8-foot ceilings use the base calculations above. Ceilings reaching 9-10 feet allow you to increase artwork height by 10-15 percent without overwhelming the space. Very high ceilings of 12 feet or more can accommodate artwork 20-25 percent larger in both dimensions to maintain visual presence.
Apply the adjustment after calculating your base dimensions. If your initial calculation suggests 48 inches wide by 32 inches high for a standard ceiling, multiply both dimensions by 1.15 for a 10-foot ceiling: 55 inches wide by 37 inches high. This adjustment ensures artwork remains proportional to the increased vertical space.
Horizontal Orientation Artwork: When Width Matters Most
Horizontal orientation artwork emphasizes width over height, creating visual effects that suit specific spaces and furniture arrangements. Understanding when to choose horizontal pieces versus vertical or square formats elevates your interior design decisions and ensures artwork enhances rather than conflicts with your room layout.
Ideal Spaces for Horizontal Art
Horizontal artwork naturally complements furniture with strong width emphasis. Sofas, beds, console tables, and dining room buffets all feature horizontal lines that pair beautifully with wide artwork. The horizontal format reinforces the furniture's visual direction, creating cohesive design flow throughout the room.
Above a sofa represents the most common placement for horizontal art. The artwork's width echoes the sofa's length, establishing visual connection between wall and furniture. A 90-inch sofa pairs ideally with artwork 60 inches wide, following the 2/3 rule, with the horizontal format naturally suited to this proportional relationship.

Width-to-Height Ratios for Horizontal Pieces
Horizontal artwork typically follows width-to-height ratios between 3:2 and 2:1. A 60-inch wide piece might measure 40 inches high (3:2 ratio) or 30 inches high (2:1 ratio). The more elongated 2:1 format creates dramatic horizontal emphasis ideal for very wide furniture or space above king-size beds.
Consider your wall height when selecting ratios. Standard 8-foot ceilings with furniture 32 inches high leave approximately 64 inches of vertical space. A 60-inch wide artwork at 3:2 ratio (40 inches high) fits comfortably, while a 2:1 ratio (30 inches high) might appear too compressed unless you compensate with increased width.
Panoramic and Ultra-Wide Formats
Ultra-wide formats exceeding 2:1 ratios suit specific architectural features. Long hallways benefit from panoramic artwork that draws the eye down the corridor's length. Above fireplace mantels, wide horizontal pieces balance the mantel's strong horizontal line while leaving space for the firebox opening below.
These dramatic formats require careful measurement. An ultra-wide piece measuring 72 inches wide by 24 inches high (3:1 ratio) demands ample wall space without competing fixtures. Calculate your clear wall width and subtract 12-18 inches on each side to ensure the artwork does not crowd adjacent walls or architectural elements.
Horizontal Diptychs and Triptychs
Multi-panel horizontal arrangements multiply visual impact. A diptych comprises two panels hung side by side, while a triptych features three panels. Calculate total width including panels and spacing to maintain the 2/3 furniture proportion rule. Three 20-inch panels with 3-inch gaps create a 66-inch total width (20 + 3 + 20 + 3 + 20).
Panel height should remain consistent across all pieces in the arrangement. Mixed heights create visual confusion and undermine the horizontal emphasis. Space panels 2-4 inches apart depending on frame size. Larger panels can accommodate wider spacing, while smaller panels benefit from tighter grouping to maintain cohesion.
Balancing Horizontal Art with Vertical Elements
Rooms dominated by horizontal lines benefit from occasional vertical elements for contrast. While your primary artwork above the sofa might be horizontal, consider adding vertical pieces on adjacent walls or in alcoves. This variety prevents visual monotony and creates more dynamic, interesting spaces.
Table lamps, floor lamps, and tall plants can provide vertical counterpoints to horizontal artwork. Position these elements strategically to frame your horizontal pieces and guide the eye around the room. The interplay between horizontal artwork and vertical accessories creates balanced, professionally designed spaces.
Room-Specific Art Sizing: Tailoring Dimensions to Each Space
Each room in your home presents unique sizing considerations based on function, furniture arrangement, and viewing patterns. Professional designers adjust their approach for living rooms differently than bedrooms or dining areas. These room-specific guidelines help you select artwork dimensions that enhance each space's particular character.
Living Room Art Sizing
Living rooms typically feature the largest artwork in your home due to expansive wall space and viewing distances. Above the sofa, artwork should measure 60-75 inches wide for standard three-seat sofas measuring 90-96 inches. Sectional sofas require even larger pieces or gallery wall arrangements spanning 72-90 inches total width.
Height should account for the sofa back height plus proper hanging distance. Position the artwork center at 57 inches from the floor (standard eye level), allowing 6-10 inches between the sofa back and the artwork's bottom edge. This spacing prevents the artwork from appearing to sit directly on the furniture while maintaining visual connection.

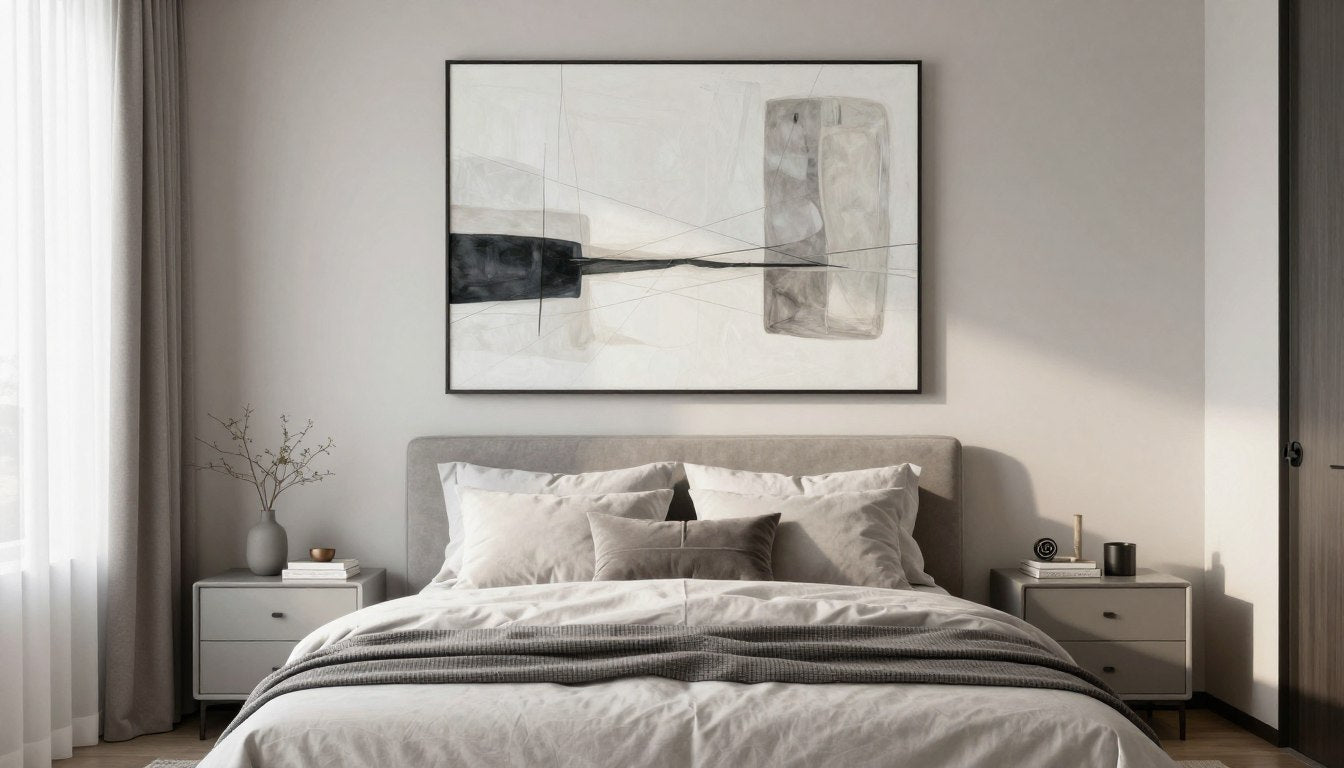
Bedroom Wall Art Dimensions
Bedroom artwork above the bed should reflect the bed's width. Queen beds measuring 60 inches wide pair with artwork 40-50 inches wide. King beds at 76 inches wide accommodate pieces 50-60 inches wide. These proportions maintain the 2/3 rule while suiting the more intimate viewing distances common in bedrooms.
Vertical space over beds differs from living room applications. Position artwork 6-8 inches above the headboard or mattress if no headboard exists. The lower viewing position from the bed means artwork can hang slightly lower than the standard 57-inch center point while still appearing properly placed.
Dining Room Artwork Sizing
Dining room pieces complement buffets, sideboards, or appear on feature walls. Above a buffet, follow the 2/3 rule based on furniture width. A 60-inch buffet pairs with 40-inch wide artwork. On walls without furniture, center artwork on the wall and size based on overall wall dimensions, targeting 30-40 percent wall coverage.
Consider the dining table's visual weight when sizing artwork. Large dining tables benefit from substantial artwork that anchors the room. A table seating eight or more calls for artwork at least 48 inches wide to provide adequate visual presence. Smaller bistro tables for four work well with 24-36 inch pieces.
Hallway and Entryway Dimensions
Narrow hallways require special consideration. Measure hallway width and select artwork no wider than half the hallway width to prevent overwhelming the space. A 48-inch wide hallway accommodates artwork up to 24 inches wide. Vertical orientations often suit hallways better than horizontal formats due to limited width.
Entryway artwork creates first impressions. Scale these pieces to the entry wall height and width, typically ranging from 24-40 inches for standard residential entries. Larger foyers with two-story ceilings can accommodate dramatic pieces reaching 60-72 inches, but ensure proper proportion to wall dimensions.
Home Office and Study Spaces
Office artwork should inspire without distracting. Position pieces within your natural sight line when seated at your desk. Artwork measuring 24-36 inches wide works well on walls behind monitors or filing cabinets. Avoid oversized pieces that dominate the space and compete for attention with work tasks.
For three-dimensional impact in any room, consider sculptures that add depth without requiring wall space. These pieces work especially well in offices, entryways, and on console tables where traditional wall art might not fit the available space.
Bathroom Art Sizing
Bathrooms present moisture and size challenges. Select smaller pieces, typically 16-24 inches, that fit available wall space between fixtures. Position artwork away from direct shower spray and steam exposure. The intimate viewing distances in bathrooms mean smaller artwork maintains visual impact despite reduced dimensions.
Common Art Sizing Mistakes and How to Avoid Them
Even experienced decorators make sizing errors that diminish artwork's impact. Recognizing these common mistakes helps you avoid them in your own spaces. This section identifies frequent sizing problems and provides specific solutions to ensure your artwork achieves maximum visual effect.
Choosing Artwork That Is Too Small
The most frequent mistake involves selecting artwork significantly smaller than the space requires. A 24-inch piece above an 84-inch sofa appears lost and insignificant, creating awkward visual imbalance. This error stems from underestimating the visual weight needed to anchor large furniture or wall space.
Remedy this by always measuring furniture width and calculating the 2/3 guideline before shopping. Bring measurements when browsing galleries or shopping online. If you already own artwork that appears too small, create a gallery wall arrangement by adding complementary pieces to increase the overall display width to appropriate proportions.

Hanging Art Too High or Too Low
Incorrect hanging height undermines even perfectly sized artwork. The standard 57-inch center point (measured from floor to artwork center) suits most applications, but many homeowners hang art significantly higher, disconnecting it from furniture and creating awkward gaps. Others hang too low, causing artwork to appear as though it is sitting on furniture.
Measure carefully before hanging. Mark the 57-inch point on your wall, then position your artwork center at that height. When hanging above furniture, ensure 6-10 inches of space between furniture top and artwork bottom. This spacing connects the artwork to the furniture without crowding or creating excessive gaps.
Ignoring Room Proportions
Artwork sizing must respond to overall room dimensions, not just furniture width. A properly sized piece for a sofa might overwhelm a small room with low ceilings or appear insufficient in a room with soaring 12-foot ceilings. Consider ceiling height, wall width, and room volume when making final size selections.
Calculate wall coverage percentage to verify appropriate sizing. Multiply artwork width by height, then divide by total wall square inches (wall width × wall height). Target 30-40 percent coverage for balanced impact. Adjust sizes up or down based on this calculation to ensure artwork suits the overall wall proportions.
Mixing Incompatible Sizes in Gallery Walls
Gallery walls require size relationships between pieces. Random size combinations without visual logic create chaotic, unprofessional results. Effective gallery walls either feature consistent frame sizes or follow size progression patterns with a clear largest focal piece surrounded by smaller complementary works.
Plan gallery layouts on paper before hanging. Cut paper templates matching each frame size and arrange them on the floor to test combinations. The gallery's overall envelope should follow the 2/3 rule based on furniture width, with individual pieces sized to create visual rhythm rather than random size jumps.
Forgetting About Sight Lines and Viewing Distance
Viewing distance dramatically affects perceived artwork size. A 30-inch piece appears substantial from five feet away but diminishes when viewed across a 15-foot room. Homeowners often select artwork based on close viewing at galleries without considering their home viewing distances.
Measure the distance from your primary seating to the wall before selecting artwork. For viewing distances under 6 feet, artwork between 24-40 inches works well. Distances of 8-10 feet require 40-60 inch pieces. Rooms with viewing distances exceeding 12 feet demand artwork 60 inches or larger to maintain presence across the space.
Overlooking Frame Width in Calculations
Frame width adds inches to artwork dimensions. A 40-inch wide canvas in a 3-inch wide frame becomes 46 inches total width (40 + 3 + 3). This additional width matters when calculating whether artwork fits available wall space or maintains proper furniture proportions.
Always ask about frame dimensions when purchasing. Add frame width to each side of the artwork dimensions to calculate total display size. Online shopping requires special attention to this detail, as product dimensions sometimes list canvas size without frame width, leading to surprises when the piece arrives larger than expected.
Advanced Sizing Techniques for Complex Spaces
Challenging architectural features and unconventional layouts require advanced sizing approaches. These professional techniques address situations where standard guidelines need adaptation. Master these methods to handle any space configuration with confidence.
Sizing Art for Angled and Vaulted Ceilings
Vaulted ceilings create expanding vertical space that affects artwork proportion. In rooms with angled ceilings, measure wall height at the lowest point where furniture sits. Use this measurement rather than peak ceiling height for initial calculations, then adjust upward by 10-15 percent to account for the overall room volume.
Position artwork to follow the ceiling angle subtly. The artwork center point can shift up to 60-62 inches in vaulted rooms instead of the standard 57 inches, drawing the eye upward to emphasize the architectural feature. Ensure adequate space remains between artwork top and the lowest point of the angled ceiling.
Multi-Wall Gallery Arrangements
Corner galleries that wrap two adjacent walls require unified planning. Calculate total linear footage across both walls, then plan artwork distribution to create visual flow from one wall to the next. The corner serves as a natural transition point where slightly smaller pieces can turn the corner effectively.
Maintain consistent height alignment across the corner transition. All pieces should share the same top edge height or center line alignment to preserve visual unity. Vary the widths and heights of individual pieces while keeping their placement height consistent to create rhythm without chaos.

Artwork Above Architectural Features
Mantels, wainscoting, and chair rails create horizontal lines that interact with artwork placement. Above a fireplace mantel, measure from the mantel top upward and select artwork height that fills approximately 60-75 percent of the remaining wall space. Leave equal space above the artwork as you do between mantel and artwork bottom.
Chair rails and wainscoting positioned 32-36 inches from the floor become your new baseline for measurement. Treat the chair rail as your "floor" when applying the 57-inch center rule. This positions artwork at proper eye level relative to the room's perceived proportion rather than the actual floor.
Open Concept Space Considerations
Open floor plans blur room boundaries, requiring artwork sizing that responds to multiple viewing points. Select artwork dimensions based on the nearest furniture piece following standard rules, but verify the piece maintains presence when viewed from other areas of the open space.
Create visual zones in open concepts through artwork sizing. Larger pieces define primary gathering areas like seating groups, while medium pieces mark transitional zones. This size variation helps differentiate spaces without walls while maintaining overall design cohesion across the open layout.
Sizing for Rooms with Large Windows
Expansive windows reduce available wall space and introduce bright backlighting that affects artwork visibility. Calculate available wall width on either side of windows separately. Each section becomes its own canvas for appropriately sized artwork rather than attempting to span across the window.
Position artwork on window walls at right angles to window light when possible. This prevents glare on artwork surfaces and ensures proper viewing conditions. If artwork must face windows, consider this when selecting frame glazing and positioning the piece slightly off-center from direct window alignment.
Apply Your Sizing Knowledge
You have learned professional techniques for calculating perfect artwork dimensions. Now explore our curated collections to find pieces that match your measurements and vision. Each piece is crafted with attention to quality and design that elevates your space.
Frame and Matting Impact on Final Artwork Size
Frames and mats significantly alter artwork dimensions beyond the canvas or print size. Professional framers understand how frame width and mat borders affect visual weight and final display dimensions. These considerations ensure your artwork fits perfectly within your calculated space requirements.
Understanding Frame Profile Width
Frame profile refers to the width of the frame molding. Narrow profiles measure 0.75-1.5 inches wide, adding 1.5-3 inches to total artwork width and height. Standard profiles range from 2-3 inches, contributing 4-6 inches to overall dimensions. Wide statement frames can measure 4-6 inches, adding 8-12 inches to your artwork footprint.
Consider frame width when working with tight wall space or precise furniture proportions. A 40-inch canvas in a 3-inch wide frame becomes 46 inches total width. This 6-inch difference can shift your artwork from properly proportioned to oversized for the available space or furniture width.
Mat Border Sizing Principles
Mats create breathing space between artwork and frame while increasing overall dimensions. Standard mat widths range from 2-4 inches on each side. A 20×24 inch print with a 3-inch mat measures 26×30 inches before frame addition (20 + 3 + 3 = 26 width, 24 + 3 + 3 = 30 height).
Mat width should correlate with artwork size. Smaller pieces under 16 inches work well with 2-2.5 inch mats. Medium pieces from 16-30 inches suit 2.5-3.5 inch mats. Large works exceeding 30 inches can accommodate 3.5-4.5 inch mats without overwhelming the artwork itself.

Bottom Mat Weighting
Professional framers often increase bottom mat width by 0.25-0.5 inches compared to top and side mats. This subtle weighting prevents optical illusion that makes artwork appear to slide downward in the frame. A piece with 3-inch top and side mats might feature a 3.5-inch bottom mat for proper visual balance.
This technique particularly matters for vertical orientations where height exceeds width. The additional bottom weight grounds the artwork and creates pleasing visual proportion. While the difference measures only half an inch, the perceptual impact significantly improves the finished presentation.
Calculating Total Display Dimensions
Calculate complete dimensions by adding canvas size, mat widths, and frame profile together. For a 24×36 inch print with 3-inch mats and 2-inch frame profile: width equals 24 + 3 + 3 + 2 + 2 = 34 inches, height equals 36 + 3 + 3 + 2 + 2 = 46 inches. The final display measures 34×46 inches, considerably larger than the 24×36 inch print alone.
Request exact framed dimensions before purchasing. Reputable galleries and frame shops provide these specifications. Online retailers should list both image size and framed dimensions in product descriptions. Never assume you know final size without confirmed measurements including all framing elements.
Frame Style Visual Weight
Beyond physical dimensions, frame style affects perceived size. Ornate gold frames with decorative molding appear visually heavier than simple black frames, even when physical dimensions match. Dark frames create stronger contrast against light walls, increasing perceived presence. Light frames recede visually, allowing artwork to dominate attention.
Match frame style and color to your space for optimal impact. Modern interiors with clean lines pair well with simple frames in metal or thin wood profiles. Traditional rooms accommodate ornate frames with decorative elements. The frame should enhance artwork without competing for attention or adding excessive visual weight to your wall.
Digital Tools and Visualization for Sizing Decisions
Technology simplifies artwork sizing through visualization tools and digital calculators. These resources help you preview how different sizes appear in your space before making purchase decisions. Understanding available tools and their effective use prevents costly sizing mistakes.
Wall Art Visualization Apps
Mobile apps allow you to virtually place artwork on your walls using augmented reality. Photograph your wall space, then the app superimposes artwork images at various sizes. This visual preview shows exactly how different dimensions appear in your specific room with your furniture and lighting conditions.
Leading apps offer size customization in one-inch increments, letting you test the difference between a 48-inch and 54-inch piece visually. This precision helps when working with tight tolerances or when choosing between two sizes. The technology removes guesswork and builds confidence in your selection before purchase.
Online Size Calculators
Web-based calculators automate sizing formulas. Input your furniture width and the calculator applies the 2/3 rule instantly, providing ideal artwork width recommendations. Advanced calculators account for ceiling height, viewing distance, and room type to refine suggestions beyond basic formulas.
Use calculators as starting points rather than absolute answers. They provide mathematically correct dimensions but cannot account for personal taste, existing room decor, or artistic considerations. Consider calculator results alongside your aesthetic preferences and the specific artwork's composition and subject matter.

Painter's Tape Mock-Ups
Low-tech but highly effective, painter's tape creates full-scale outlines on your wall. Measure and mark artwork dimensions, then apply tape to form a rectangle representing the piece. Step back to evaluate size, proportion, and placement before committing to a purchase.
Live with tape outlines for several days, observing them at different times of day and from various room positions. This extended evaluation period reveals whether the size feels appropriate during actual daily living. Adjust dimensions and reapply tape if the initial size appears too large or small.
Paper Template Testing
Cut paper or cardboard to exact artwork dimensions for more substantial visualization than tape. Attach templates to walls with removable adhesive, allowing you to move them easily and test different placements. Multiple templates help visualize gallery wall arrangements with precise spacing between pieces.
Paper templates prove especially valuable for complex multi-piece installations. Arrange all pieces on the floor first to finalize layout, then transfer templates to the wall one by one. This method prevents hanging errors and allows adjustment before creating permanent nail holes.
Professional Design Software
Interior design software offers sophisticated visualization with accurate scaling and lighting simulation. Programs allow you to input exact room dimensions, furniture placement, and artwork sizes, then render realistic views from multiple angles. These tools suit homeowners planning extensive renovations or decorating multiple rooms simultaneously.
Professional designers frequently use this software to present options to clients. If you are working with an interior designer, request digital renderings showing artwork at different sizes in your space. These visualizations facilitate better communication about sizing preferences and ensure satisfaction before finalizing purchases.
The Relationship Between Budget and Artwork Size
Artwork pricing typically increases with size, but the relationship is not always linear. Understanding how size affects cost helps you make informed decisions that balance aesthetic goals with budget realities. Strategic approaches allow you to achieve proper sizing without overspending.
How Size Affects Artwork Pricing
Original paintings and limited edition prints generally price by square inch. Larger works require more materials, increased labor time, and greater artistic skill to execute successfully. A 48-inch piece might cost three to four times more than a 24-inch work from the same artist, even though dimensions only double.
Canvas prints and reproductions show more affordable size scaling. Digital printing technology maintains consistent per-square-inch costs across size ranges. This makes prints an economical option when you need larger dimensions to satisfy room proportions but face budget constraints.
Alternative Strategies for Large Wall Coverage
Gallery walls provide impressive scale through multiple smaller pieces that cost less individually than one large work. Three 20×24 inch framed prints might total less than a single 48×36 inch original painting while covering similar wall space. The multi-piece approach offers flexibility and visual interest alongside budget advantages.
Consider mixing original small works with larger prints for dimensional variety within budget. An affordable large print creates anchor presence while smaller original pieces add authenticity and investment value. This combination strategy delivers proper sizing through intelligent piece selection rather than excessive spending on a single large original.

Investing in Proper Sizing
Undersized artwork wastes money regardless of initial cost. A beautiful $500 piece that appears too small for your space delivers less satisfaction than a properly sized $300 work. Prioritize correct dimensions over other factors when budget forces choices between size, original versus print, or frame quality.
Calculate cost per visual impact rather than absolute price. A $1,200 piece measuring 60×40 inches costs $0.50 per square inch (2,400 square inches) and properly fills your wall. A $600 piece at 30×20 inches costs $1.00 per square inch (600 square inches) and appears lost on the same wall. The larger investment delivers better value through appropriate sizing.
Phased Purchasing for Budget Management
If your ideal artwork size exceeds current budget, plan for phased acquisition. Start with a properly sized print, then upgrade to an original work when finances allow. Alternatively, begin with one large anchor piece and add complementary smaller works over time to complete a gallery arrangement.
This approach maintains proper sizing from day one while spreading costs across months or years. Your walls never suffer from obviously undersized artwork, and you build a collection thoughtfully rather than compromising on size due to temporary budget limitations.
Framing Budget Allocation
Professional framing adds 30-70 percent to artwork cost, more for larger pieces. A 48-inch canvas might cost $400 while museum-quality framing adds another $250-$350. Budget for both canvas and frame together to avoid selecting perfectly sized artwork that exceeds budget after framing costs.
Consider standard frame sizes to reduce custom framing expenses. Artwork sized to common frame dimensions (16×20, 24×36, 30×40 inches) fits ready-made frames costing significantly less than custom options. This strategic sizing choice allocates more budget toward artwork quality and size rather than framing.
Style, Theme, and Seasonal Factors in Art Sizing
Beyond mathematical calculations, artwork style and subject matter influence ideal sizing decisions. Abstract works, landscapes, portraits, and minimalist pieces each interact differently with space. Seasonal rotation strategies require sizing considerations to maintain year-round visual balance.
Abstract and Contemporary Artwork Sizing
Bold abstract pieces tolerate and often benefit from larger sizes. Abstract compositions with dramatic color and gestural marks create strong visual impact that fills space effectively. These works can push toward the upper end of sizing guidelines, sometimes reaching 75-80 percent of furniture width instead of the conservative 67 percent.
Minimalist abstracts with simple compositions and muted colors require adequate size to prevent appearing insignificant. A subtle monochromatic piece must be large enough for its quiet sophistication to register across viewing distances. Small minimalist works risk disappearing visually despite their artistic merit.
Landscape and Scenic Photography Sizing
Landscape artwork draws viewers into depicted spaces, creating visual depth that works best at substantial sizes. Panoramic landscapes particularly benefit from width that allows the scene to unfold across the wall. A sweeping mountain vista or ocean scene measuring 60-72 inches wide provides immersive experience that smaller sizes cannot achieve.
Vertical landscapes like waterfall scenes or tall trees suit narrower spaces such as wall sections beside windows or in hallways. These pieces can embrace vertical emphasis with heights reaching 48-60 inches while maintaining modest 24-36 inch widths suitable for confined areas.
Portrait and Figurative Artwork Considerations
Portraits create intimate human connection that affects comfortable sizing. Life-size or larger portraits measuring 36-48 inches feel appropriate for living rooms and dining areas where social interaction occurs. Smaller portraits of 20-30 inches suit bedrooms and private spaces where intimacy enhances the viewing experience.
Multiple figures in a composition require additional size to maintain individual clarity. A group portrait should measure 48 inches or larger to prevent figures from appearing cramped or losing detail. Single-subject portraits can work effectively at smaller dimensions while preserving impact and connection with viewers.

Text-Based and Graphic Art Sizing
Typography artwork and graphic designs require sizing that ensures text remains legible from primary viewing positions. Measure viewing distance and select sizes where text reads comfortably without straining. A text-based piece viewed from 8 feet should measure at least 30 inches wide with letter heights of 3-4 inches for comfortable reading.
Bold graphic designs with simple shapes can vary widely in size depending on visual complexity. Busy graphics with numerous elements need adequate size for clarity, typically 36 inches or larger. Simple graphics with one dominant element can work effectively at smaller scales of 20-30 inches.
Seasonal Artwork Rotation Sizing
If you rotate artwork seasonally, maintain consistent sizing across all pieces in the rotation. Purchase autumn, winter, spring, and summer pieces in matching dimensions so they interchange without requiring furniture rearrangement or different hanging hardware. Standard dimensions of 40×30 or 36×24 inches suit most rotational displays.
Mark existing nail positions with small pencil dots before removing seasonal artwork. This allows precise placement of replacement pieces without measuring and re-marking. Using identical frame sizes and hanging hardware across all seasonal pieces ensures smooth transitions and consistent visual presence throughout the year.
Frequently Asked Questions About Wall Art Sizing
What is the standard rule for sizing art above a sofa?
The standard guideline follows the 2/3 rule where artwork should measure approximately two-thirds of your sofa width. For a typical 90-inch sofa, select artwork measuring 60 inches wide. This proportion creates visual balance between the furniture and wall decor without overwhelming or underwhelming the space.
Maintain 6-10 inches of space between the sofa back and the artwork's bottom edge. Position the artwork center at approximately 57 inches from the floor, adjusting slightly based on sofa back height. These measurements ensure proper visual connection between furniture and art while maintaining professional proportions.
How do I calculate the right artwork size for my wall space?
Start by measuring your wall width and height in inches. If furniture sits against the wall, measure the furniture width and multiply by 0.67 to find ideal artwork width using the 2/3 rule. For walls without furniture, calculate total wall area and aim for artwork covering 30-40 percent of that space.
Consider viewing distance as a secondary factor. Rooms where you view art from 6 feet or less can accommodate smaller pieces (24-40 inches). Spaces with viewing distances exceeding 10 feet require larger artwork (48 inches or more) to maintain visual presence across the room. Always verify your calculations using painter's tape outlines on the wall before purchasing.
Should art be measured in inches or centimeters for proper sizing?
In the United States, artwork dimensions are standardly measured and sold in inches. All furniture, wall dimensions, and framing specifications use inches as the common unit. This consistency simplifies calculations and ensures accurate communication with framers, galleries, and retailers when purchasing art.
When shopping from international sellers who list dimensions in centimeters, convert to inches by dividing centimeters by 2.54. For example, a 100-centimeter wide piece measures approximately 39.4 inches (100 ÷ 2.54). Always verify measurements and confirm the unit of measurement when making online purchases to avoid receiving unexpectedly sized artwork.
What size artwork works best above a queen or king size bed?
Queen beds measuring 60 inches wide pair well with artwork 40-50 inches wide, following the 2/3 proportion guideline. King beds at 76 inches wide accommodate artwork 50-60 inches wide. These dimensions maintain proper scale while accounting for the more intimate viewing distances common in bedrooms.
Position bedroom artwork 6-8 inches above the headboard or mattress surface if no headboard exists. This placement sits slightly lower than living room standards due to the reclining viewing position from the bed. Consider horizontal orientations for bedroom art as they naturally complement the bed's width emphasis and create calming visual effects conducive to rest.
How does ceiling height affect appropriate artwork size?
Standard 8-foot ceilings work with baseline sizing calculations. Rooms with 9-10 foot ceilings allow you to increase artwork dimensions by 10-15 percent to maintain proper proportion to the expanded vertical space. Very high ceilings of 12 feet or more can accommodate artwork 20-25 percent larger in both width and height.
Calculate your base dimensions first using the 2/3 rule, then apply the ceiling height adjustment. For example, if calculations suggest 48 inches wide for standard ceilings, multiply by 1.15 for 10-foot ceilings to get 55 inches. This scaling ensures artwork retains visual presence in rooms with greater volume and higher wall space.
What is the correct hanging height for wall art?
The professional standard positions artwork center at 57 inches from the floor, representing average adult eye level. This measurement provides comfortable viewing for most people in most spaces. Measure from the floor to the vertical center point of your artwork, not to the top or bottom edge.
Above furniture, this rule requires modification. Ensure 6-10 inches of space between furniture top and artwork bottom edge, which may shift the center point up to 60-62 inches depending on furniture height. Gallery walls should have their collective center at 57 inches, with individual pieces arranged above and below this central line.
Can I use multiple small pieces instead of one large artwork?
Yes, gallery wall arrangements using multiple smaller pieces create visual impact equivalent to one large work while offering greater flexibility and often lower cost. Calculate the total width of all pieces plus spacing between frames, ensuring this combined measurement follows the 2/3 furniture width guideline.
Space individual frames 2-4 inches apart depending on frame sizes. Larger frames accommodate wider gaps, while smaller frames benefit from tighter spacing. Plan your complete layout on the floor before hanging, and maintain consistent top-edge alignment or center-line alignment across all pieces for professional cohesion.
Does frame size need to be included in artwork measurements?
Yes, always include frame width in your final dimension calculations. Frames add 1.5-12 inches to overall width and height depending on profile width. A 40-inch canvas in a 3-inch wide frame measures 46 inches total width. This additional size can significantly affect whether artwork fits available space or maintains proper furniture proportions.
Request total framed dimensions before purchasing, especially when ordering online. Product descriptions should list both canvas or print size and framed dimensions separately. If only canvas size appears, contact the seller to confirm frame width. This prevents receiving artwork larger than anticipated and ensures your careful sizing calculations remain accurate.
What size art should I choose for a narrow hallway?
Hallways require special sizing consideration due to limited width. Select artwork no wider than half your hallway width to prevent overwhelming the narrow space. A 48-inch wide hallway accommodates artwork up to 24 inches wide. Vertical orientations often work better than horizontal formats in confined hallway dimensions.
Consider creating a vertical gallery wall in hallways using multiple smaller pieces arranged in a column. This approach fills vertical space effectively while respecting width limitations. Space pieces 3-4 inches apart vertically and align them along a central vertical axis for cohesive presentation that guides movement through the hallway.
How do I size artwork for rooms with large windows?
Large windows fragment wall space into separate sections requiring individual sizing calculations. Measure the wall width on each side of the window separately, treating each section as its own display area. Select artwork sized appropriately for these narrower widths rather than attempting to span across the window opening.
Position artwork on window walls perpendicular to the window when possible to avoid glare on glazing surfaces. If artwork must face windows, consider museum glass with anti-reflective coating for proper viewing conditions. The reduced wall space around large windows means you may use artwork smaller than traditional room guidelines suggest while still achieving proper proportions for the available area.
Bringing Your Wall Art Sizing Knowledge Together
Mastering artwork sizing transforms your space from adequately decorated to professionally designed. The principles covered in this guide provide the foundation for confident decisions about dimensions, placement, and proportions. Remember that the 2/3 rule, proper height positioning, and viewing distance considerations work together to create balanced, harmonious interiors.
Start with careful measurements of your wall space and furniture dimensions. Apply calculation methods appropriate to your specific situation, whether you are working with standard rooms or complex architectural features. Use visualization tools to preview sizing decisions before committing to purchases, and do not hesitate to adjust dimensions based on your personal aesthetic preferences within professional guidelines.

The relationship between artwork and space extends beyond mathematics into the realm of emotional response and personal expression. While guidelines provide structure, your intuition about what feels right in your space matters. Trust the calculations to establish your range of appropriate sizes, then select specific dimensions that resonate with your vision for the room.
Consider how different artwork styles interact with sizing principles. Abstract works may embrace larger scales, while delicate watercolors might suit more modest dimensions despite occupying the same wall space. Frame selection affects both physical dimensions and visual weight, influencing how artwork presents in your environment.
At Rossetti Art, we understand that selecting perfectly sized artwork requires both technical knowledge and artistic sensibility. Our curated collections feature premium canvas prints, original paintings, and distinctive sculptures in diverse dimensions to complement any space. Each piece is crafted with attention to quality and design that elevates interiors beyond ordinary decoration.
Apply the sizing principles you have learned here as you explore our collections. Measure your space, calculate ideal dimensions, and browse with confidence knowing you possess the expertise to select artwork that fits perfectly. Your walls deserve art that enhances their proportions and reflects your sophisticated taste.
Interior design success comes from the intersection of technical precision and creative vision. You now have both the tools and knowledge to achieve professional results in your home. Whether you are decorating a single room or reimagining your entire space, proper artwork sizing serves as the foundation for environments that inspire and delight for years to come.

Leave a comment
This site is protected by hCaptcha and the hCaptcha Privacy Policy and Terms of Service apply.